
Complete Guide for New Players
By Foureyes.
Before you begin playing, check the options. I have increased text size and animation speed somewhat because I am old and impatient. The combat in this game becomes more interesting if you disable “Display enemy turn order in battle.” Make sure to check the Accessibility tab too. I like the outlines to be radioactive green, but pink is an option if you prefer that.
Okay, let’s get started. Your companions are … whatever you like. I like to start with Deserters. This lets you start with a Swordsman, a Warrior, an Archer, and a Ranger. It’s a balanced team. For “Your companions…”, I pick “show incredible resilience” – this gives your companions a few more hit points. “Arguably are excellent at slap games” is a better option. However, in my experience, your mercenaries will end up hitting hard enough without having a 10% bonus to critical damage. “…are used to long walks” is another tempting option if you find it difficult to make enough money in this game. The other two options strike me as being less useful. “…are cunning fighters” is a trap – if you play Adaptive, since the enemies scale with you. There’s no rush to level up in this game, and if you level up too fast, you may struggle in combat because your equipment is not good enough. “Are exceptionally smooth talkers” reduces the recruitment cost of companions. There’s no need for that if you know how to play the game.
If they had a flaw, it would be … You need to pick a debuff for your team – a debuff to carrying capacity is rather trivial, but “a very relative sense of loyalty” is appropriate for Deserters. It also happens to be a debuff that I never think about because I make enough money to pay my team of misfits – appreciated and valued coworkers.
After these three choices, you are faced with the most important: Adaptive Exploration or Region-locked Exploration? This cannot be changed during your campaign, so choose wisely! I want the game to be challenging, and I also want to be able to run around between regions as I like, hence Adaptive Exploration is the only viable choice. If you want to be able to chill and level up your party in a region without your enemies becoming stronger, then you need to pick Region-locked Exploration.
Naturally, pick difficulties that you find appropriate. You can change this later if you change your mind. Ironman is not something that I would recommend – people just get grumpy if they happen to run into a fight they cannot win, encounter a bug, etc. I go with Extreme/Extreme/Limited. If you have played the game before, you may be able to change the starting region. This guide will start in Tiltren county.
Now, finally, you get to customize your mercenaries. If you have a Ranger, name him Dynamo (after the Wartales community manager). If you are a streamer, pick names that you can pronounce. Customize the appearance of your team as you see fit and remember to pick starting weapon, utility, and traits. My Swordsman and Warrior get the traits Strong, Brawny, and Loafer. This translates into a bit more damage and a few more hit points. Quick, Bloodthirsty, and Loafer is another tempting alternative. However, the traits are not super important in this game – pick what you like, and it’s OK to roleplay. Perhaps you want your party to be led by a Drunkard? I give the Swordsman the utility Taunt, the Warrior and the Ranger get Wrath, and the Archer gets First Aid. The Ranger and the Archer get the traits Nimble, Brawny, and Loafer. (The damage output from Rangers and Archers depends on their Dexterity rather than on their Strength). Give your little Pony the traits Stocky, Brawny, and whatever debuff you feel is appropriate.
Double-check your choices, then click start. Now it’s time to play the game! The first thing I like to do is to go to camp; by default, you do this by pressing C. Left-click and drag to move objects and companions. In general, if you are unsure about something in this game, hover over it to see if there is a helpful popup. Make one of your companions a tinkerer (by right-clicking on the companion, then click on the + next to their name to pick a profession). Drag your tinkerer to the Workshop so they get to work. They are going to stay at that bench for most of the game, making Raw Materials (repair kits) during every rest. Work life sucks – get rich or die trying! I like my Archer to be the tinkerer.
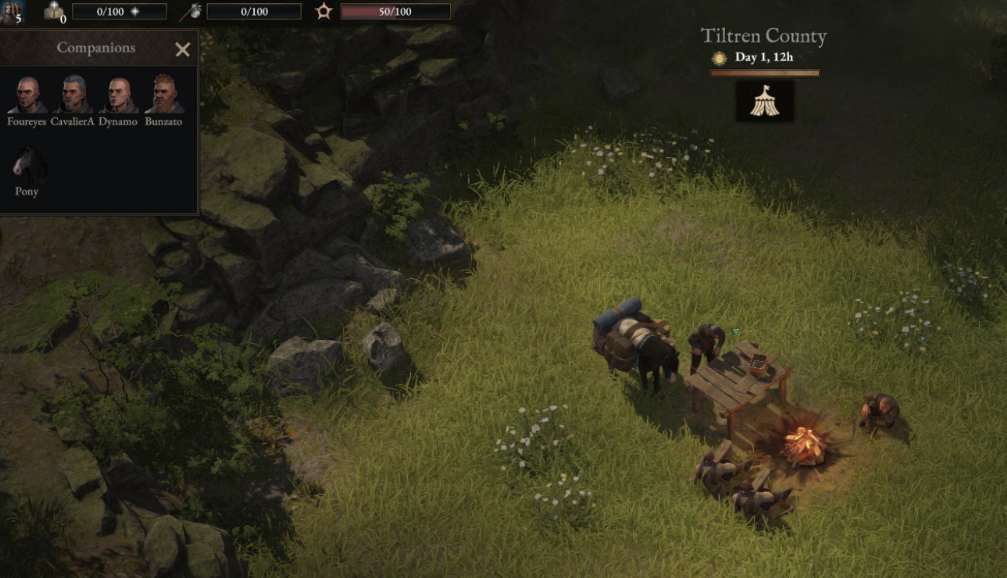
Close the camp and pick up the nearby resources. You will get attacked by Bandits. Before the combat starts you can place your companions – leftclick and drag to move them. You are going to fight a lot of Bandits in this game so you better learn what they can do. Rightclick on enemies to see what abilities they got. The hoodlums can stab and poison you – rude. Utilities like Taunt cost Valour Points (VP) – note that they are shared by the team.
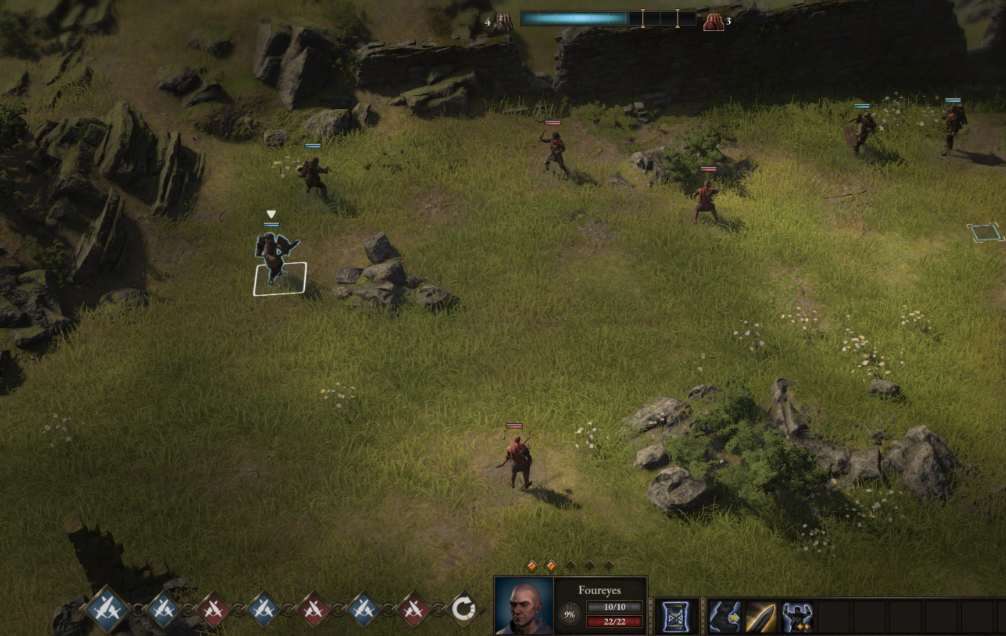
Since this is the first fight in the game, it’s not going to be too difficult. Just try to ensure that a hoodlum doesn’t get the chance to hit one of your companions in the back. Additionally, try to place your companions so that the poacher either has to move or risks friendly fire if he wants to shoot. As in other turn-based games, it’s often better to kill an enemy than to injure two. Wartales is forgiving compared to other games, but until you’ve learned the game, think twice before you act. The hourglass ends your turn. Engage the hoodlums with your tanky companions, in my case, a Swordsman and Warrior, stab one of them in the back with the Ranger, and move your Archer so he gets a clear shot – your companions are not fond of friendly fire. After the fight, loot all, but leave the human remains. If you got a dagger or a bow, make sure to replace your Rusty Shiv or Improvised Bow.
If you collected the nearby resources, you should have 2-3 Iron Ore. Go to camp, right-click on the workbench and craft a Lockpick and a Fish Hook. This will grant you your first Knowledge Point (KP). Click on the open book icon in the upper left corner to spend it. Run is probably the most popular choice. However, since I started with Deserters, I also started with 50 Suspicion (Sus, henceforth). I’m not fond of that, hence I pick Artful Dodgers. Save the game then go and visit the nearby stables. This will give you your second KP; I spend it on Run.
Hold down Alt at the stable to highlight interactable objects, there’s hemp somewhere – make sure you pick it up. Then click on the barrel and click on steal to unlock the second profession: thief. Naturally, my Rogue Ranger will be my thief. I don’t want to let my Sus get above 100 this early in the game, but you might like to steal something. The sneaky devs have hidden wheat behind the stables. Hold down the right mouse button and drag to rotate your view. I buy a horseshoe and equip it on my pony to get a bit of extra speed. Enter camp again and craft a Rope with the hemp you just picked up and if you can, craft a Piton too. If you leave the stable and look closely, you’ll see smoke close to the road – there’s a barrel with 5 cloth there! In Wartales, you take what you can and give what you must – just like in every stable relationship.
You can inspect the roadsign if you want directions. Stromkapp is to the west – the jail is to the east. I’m going to jail. Follow the road to the east and turn left before you encounter the drunkards running around on the road. There’s iron ore and wood in the forest. Rotate your view if you don’t see the resources. Visit the jail and talk to the warden, she recommends you to give bounty (not booty) hunting a try – you should. Buy three chains. You may need to sell something, such as a rusty weapon, to be able to afford that. You can fish close to jail. This is the first of many tiresome entertaining minigames that you’ll encounter in Wartales. You need to keep the fish in the black area to succeed. Sell the fish at jail and move to say hello to the drunkards on the road. Take their advice and leave them alone. Move towards the mine, about now your companions will be tired and want to rest. Spend a KP on Rationing before you camp and feed your team. Don’t worry about the danger level here – it’s due to the drunkards. A merchant will disturb your rest – let him join and sit at your campfire.
You can visit the salt mine if you like – I do it on my way back to jail once I’ve captured three outlaws. Visit the nearby Lund farm, talk to the crying lady, and learn to chop wood and pick locks before you leave. You might want to save before you do that. There’s also a cat in the hay – make sure you pet it. Move towards the mill – Bandits are nearby – engage them and try to capture three of them. Use the same tactics as before. The tricky part in this fight is damaging the enemies enough so that you can capture them but not so much that they die. Only enemies engaged in combat can be captured and only companions not engaged in combat can capture (Knock Out). Note that both your companions and enemies take damage from poison at the end of their turn. Save after the battle and visit the mill.
Hakert is sitting here, inspect him to see his traits, then talk to him. Pick whatever option you like. I killed him. Hold down Alt to highlight interactable objects and take everything. Note that there’s a body on the loft with a work manual – make sure you take and read it. Pick up some nearby resources and start walking back to jail. Don’t bother the guy (Mathias Lund) with the Crown. He is the region boss. I’m going to deal with him later. You’ll need to rest again before you get back to jail. Place your prisoners close to your companions to reduce the risk that they will escape. Use the pony to help guard them.
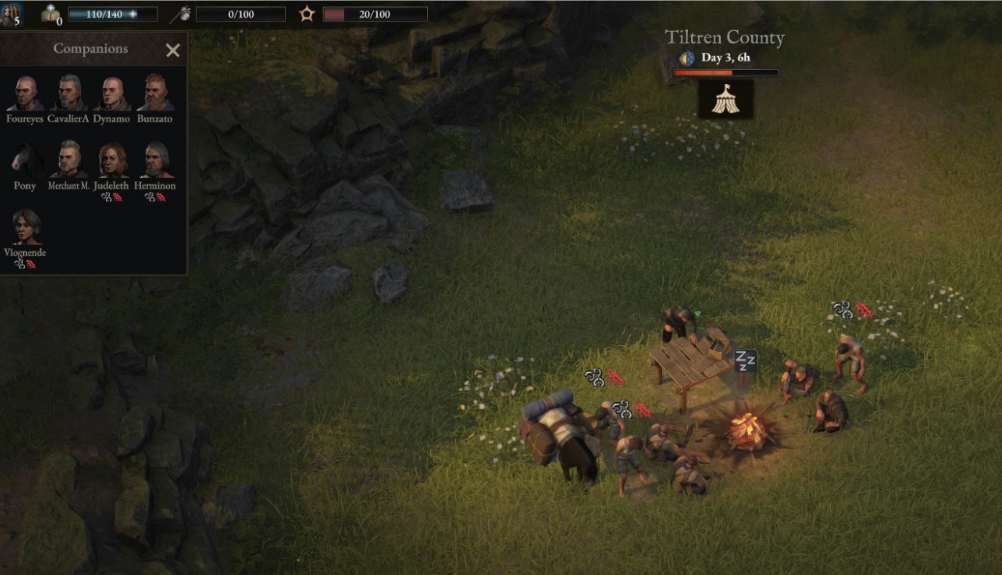
If you didn’t visit the salt mine before, then make sure you visit it on your way to jail. If you can threaten the foreman without your Sus going above 100, then do it. Once you’re in, it’s time for you to learn another fun minigame. How exciting. Hold down Alt to highlight the iron veins. Talk to the foreman again before you leave. Run to jail, talk to the warden, and hand over the prisoners. This might be a good time to visit the Paths – click on the crest with the trophy at the bottom to the right. Hover over the challenges to see what you need to do. If you play the game in a normal way, the path Crime and Chaos will prove to be the hardest to level up. In my experience, you don’t need to worry about the other paths. After having turned in the prisoners, my Sus was almost 0, so I intend to take the opportunity to steal something – something that doesn’t risk pulling Sus above 100!
Now it’s time to visit Stromkapp, so run towards the stables. When I visited the stables before, I noticed that there were 3 cloth in a barrel, but this is random. I decided to steal the cloth, but the wheat was a tempting option. After that, my Sus was at 87, so it was best to behave – for a while. Follow the road to Stromkapp.
At Stromkapp, visit the market first to get rid of the merchant that joined before. Give food to the beggar. Check what the merchants sell. One of them will sell Leather – buy all. Now, it’s time to visit the Forge. I had 10 leather, 15 cloth, 12 wood, and 22 iron ore – enough to craft weapons and armour at the anvil. I turned my former miner into a blacksmith since I intend to chop more wood with my woodcutter soon. I crafted Rags and a Targe, which provided me with a KP. Since I wanted an iron sword and axe, I invested it in Weapons I. I was able to craft both, but barely! Replace your rusty weapons with the new ones if you can. Companions need to be level 2 to equip iron weapons.
Visit the inn and sell the rusty weapons you don’t need to the innkeeper, then buy the apple pancake and some brandy. Talk to the informant, but don’t waste influence on buying something, then talk to the emissary to see the available contracts. If there are contracts to exterminate rat nests, kill Mathias Lund, or loot the Bandits’ lair – accept them and then cancel them. At this stage, you can accept up to three contracts, and you should do so. I usually don’t recruit more mercenaries this early in the game, but there was a cute lady there, a Nimble, Brawny Pugilist. I felt that I needed her in my team, hence I adjusted my plans somewhat. Buy some apples, cabbage, and grapes at the market. Leave the city, check the roadsign and head west to the lumbermill. Talk to Ines, chop wood, get the key from the loft. Use the key to open the hatch and go down. There’s a work manual here – take it. Don’t talk to the refugees! Thanks to the work manual, I now had three KP – just what I needed. I went back to the inn, used my KP to get Smooth Talk and Fast Training, then I recruited the Pugilist. I went back to the Forge to craft another shield and throwing knives. I then visited the Apothecary; I couldn’t craft anything, but it allowed me to turn my Pugilist into an alchemist.
Since I got the “The Tavern Opens!” DLC, there’s also a Derelict Tavern in Stromkapp for me. I love Wartales, but I’m not a fan of the DLC. I can’t give advice about how to run a tavern since I’ve never done it before and it doesn’t interest me at all, but it makes sense to buy the tavern and start dealing with it immediately. After having dealt with my new tavern, it was time for my companions to rest again and for me to plan their future. I noticed that my tinkerer could craft a Torch at the workbench, so I did and gave it to my Ranger. Torches are good, but be careful when you play with fire. I let my companions eat the apple pancake and gave them some alcohol.
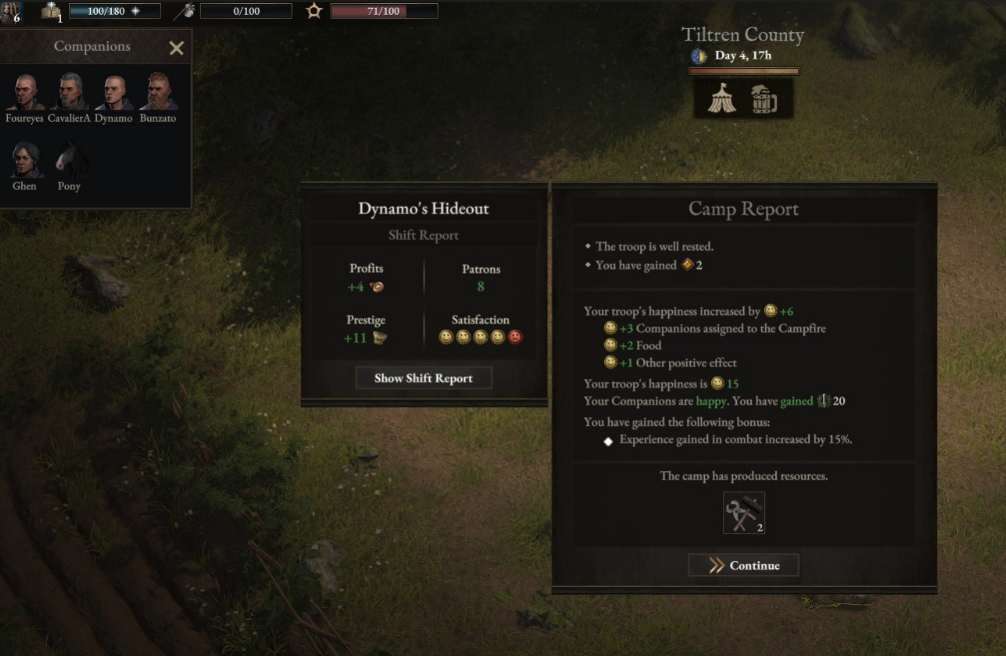
I am already bored by my new tavern but some find it entertaining to tinker with it. Regardless, it is time to make some money and gain some experience by fighting! Find a band of Refugees and attack them. Try to capture three of them alive. Level 1 Refugees should not present a problem, but later in the game they can be annoying, especially once they have learned to use their torches. This early in the game you generate VP slowly, so use them wisely.
My Ranger levelled up after the fight. I like to give my Rangers Valorous Victory, because later in the game Rangers become very strong and can finish several enemies in one turn. My Warrior had levelled up earlier – I made him a Berserker. In the early game I think Berserker is the best option, Executioner and Sentinel becomes more attractive later, when you have a bigger party and face more enemies.
After the fight run to the lumbermill, go down into the cellar again and talk to the refugees there this time. When you go up again Ines is gone, how curious. Use this opportunity to take the wood from the wood piles. Take what you can – give what you must. When you leave the lumbermill Ines and a group of bandits engage you, negotiate with her, pay her, and accept her proposal… It so happens that she wants refugees. Enter the lumbermill again and hand over the refugees you just captured. She gives you money and wood for every captured refugee and they get jobs! I had 30 wood after this transaction, a bit more than I need right now so I sold some in Stromkapp.
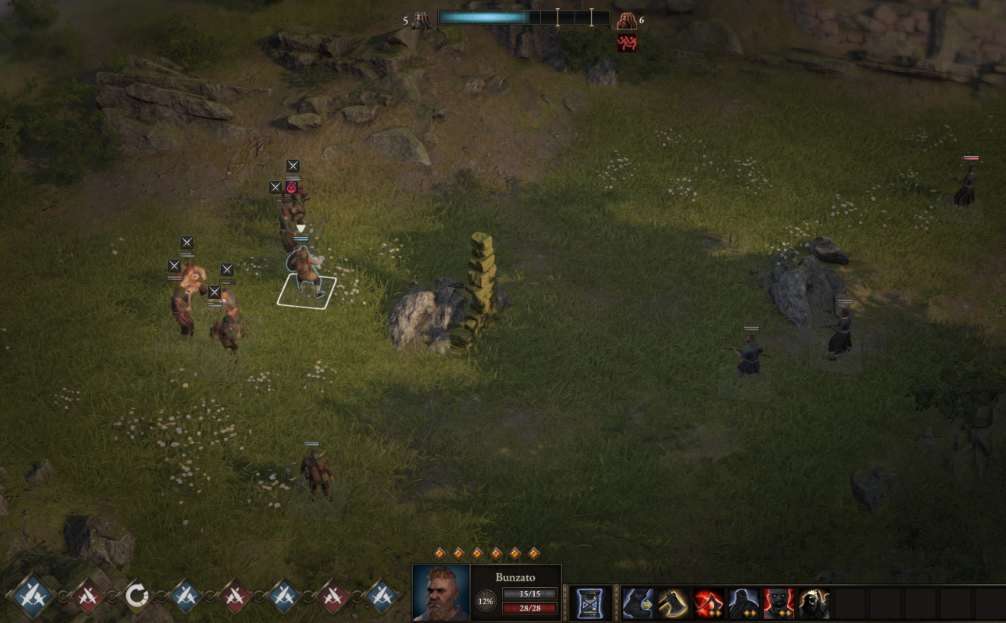
At this stage of the game, you have two options – you can find another band of refugees and capture them to get more wood and money from Ines, or you can pursue one of your contracts. Click M to check your map. I decided to go after a bandit group in the north, hence took the road towards Vertruse. There is a small camp in the mountains close to the Sinister Cave; loot the barrel there and use a piton to get down from the mountain.
My companions wanted to rest (and get paid) close to the Guard Outpost, so I did, but I talked to the captain there first and accepted his contract. I also chopped wood. Note the chest in one of the tents – you need a golden key to open it. Visit the Sinister Cave and pick the lock to the chest, get the iron ore and the gems. Thanks to the iron ore from the cave, I could let my tinkerer craft a Cooking Pot and a Camp Chest. Do not take the fight against the bandits in the cave unless you have some VP. If you take the fight, beware of the ringleader – he is dangerous. There are two tactics here: Either you try to kill the ringleader immediately, or you engage him with a tanky companion equipped with a shield and use Protection. Note the rockslide in the cave – any units that remain in the red circle at the end of a round die. (You can side with the bandits instead and kill the guards. I preferred to fight the bandits here since I wanted to capture outlaws and exchange them for money at the jail).
I was lucky during the fight in the cave – my Berserker was able to kill the ringleader before he could act. Try to place your units so that hoodlums do not get a chance to backstab; besides that, use the same tactics as before. Note that torches lying on the floor can be thrown and cause a bit of damage. Also note that if you click on an enemy and hover over Move (the boot), then you can see its movement range. If you gain any temporary VP from the trait Glorious (companions can get this trait when they kill an enemy leader), make sure to use them. In addition, remember that both your companions and enemies take damage from burning and poison at the end of their turn. Loot is random. I got a Master’s Jacket with +2 movement. My Archer leveled up after the fight – I like to give my first Archer Valorous Support. After the battle, talk to the captain and inspect the body of the bandit leader on the cave floor. The bandit body has the golden key you need. Return to the Guard Outpost and use the key to open the chest.
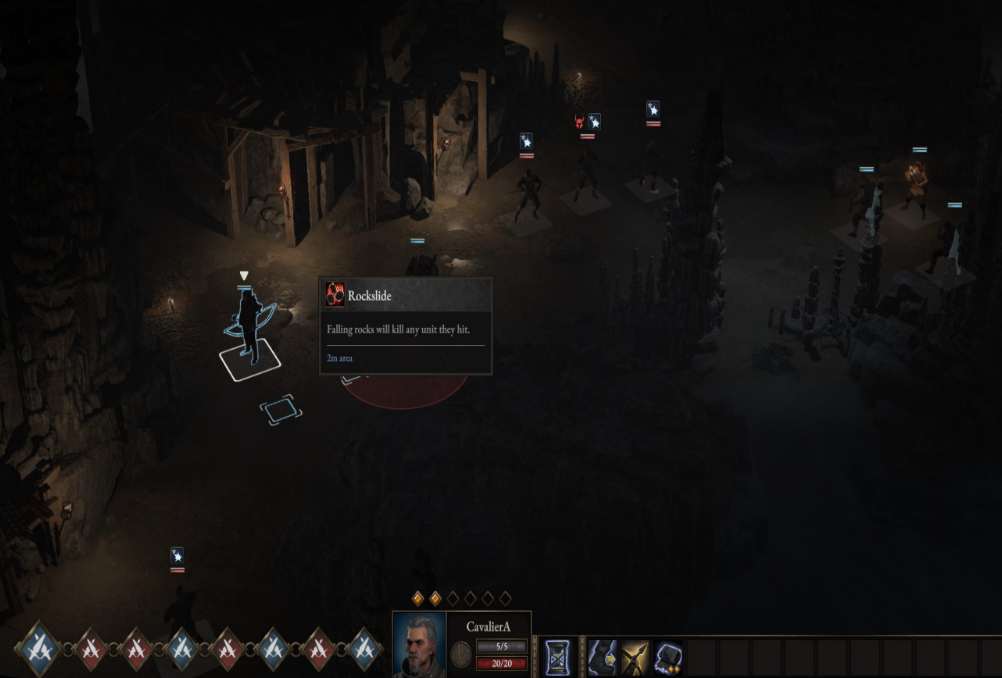
I had a contract to kill some nearby bandits so I decided to take them on. Since they were running around in a forest I had an opportunity to ambush them. You do this by attacking them in the back. In some situations you can also ambush enemies if you leave a forest and the enemies are out in the open – look for a knife about the enemy group in such cases.
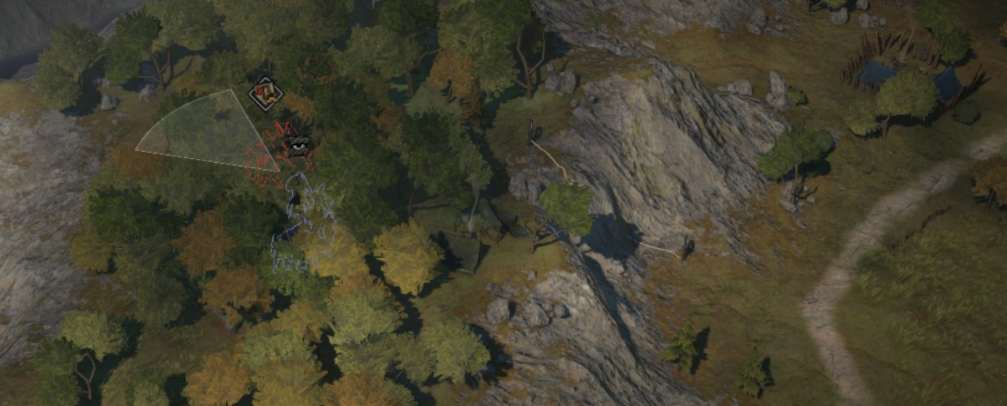
My Swordsman levelled up after the fight in the forest. I like to let my first Swordsman be a Fighter because Destabilising Strike is good throughout the game. Since I had captured three outlaws it was time to visit jail and turn them in. (The jail in Tiltren cannot accept more than three at a time). By the way do not worry about the Sepulchre door close to jail – you will learn how to open it later in the game, forget about it for now.
After having turned in one outlaw my Sus was almost 0 again … so I decided to take a risk and stole the Toothpaste recipe and my Sus went over 100 – hence I became wanted by the guards. I handed in the other outlaws to reduce my Sus, but as long as I am Wanted any guard patrols that spot my party will hunt after it. However, at this point I had almost no food and had to return to
Stromkapp to collect the reward for having completed my first contract. A guard patrol immediately decided to come after me so I went into the forest and ran into a group of Deserters. They count as outlaws, but do not have the same units as Bandits. This early in the game the Deserters only had henchmen and raiders. The raiders need one turn to set-up before they strike, hence worry about the henchmen first.
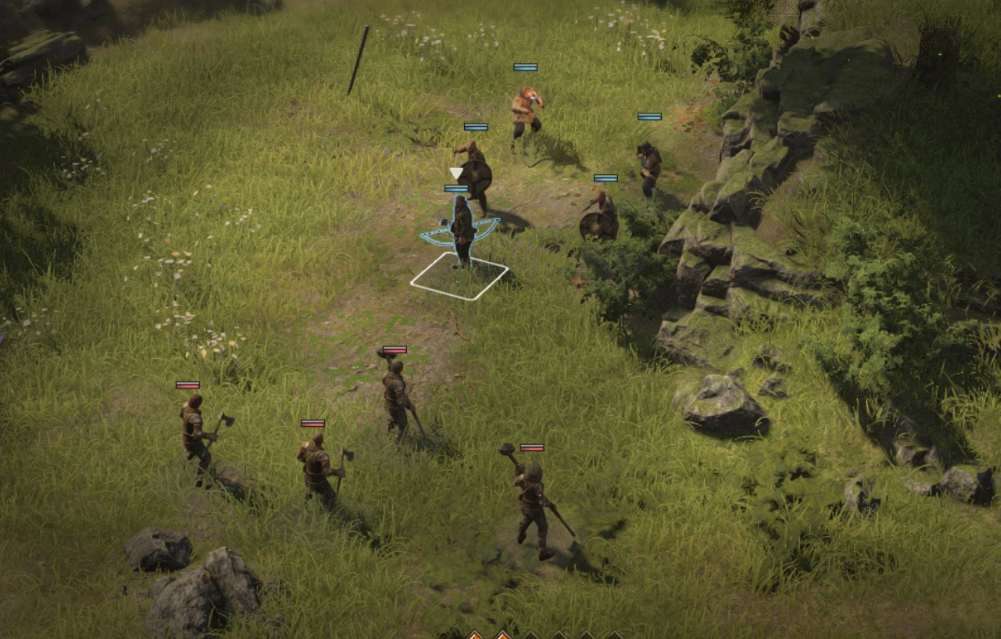
Since my Archer got Valorous Support I like to start combats with a shot and then run back with him to generate a VP. (On Extreme difficulty basically all skills, like Taunt, cost 2 VP). I managed to capture three, but it takes some time before the jail can accept a new batch of prisoners. A group of (level 1) boars also decided to engage my party. This early in the game they do not constitute a threat and there not much to think about. However, the boars get Fury and hit harder after you kill one of them. If the boars are separated in two groups try to deal with one before the other group can engage. Tanky companions in the front (Swordsman, Brutes, Warriors), soft companions (Rangers, Pugalists, Archers) in the back.
My little pony decided to level up after the fight against the boars. Since this pony will never see combat I put all points in Constitution – to increase carrying capacity. My companions wanted to rest once again and since I had almost no food I saved, prayed to RNGesus and allowed them to eat raw pork from the boars. (Uncooked food can give one of your companions the trait Delicate and I hate that). Since it would take some time before jail will accept prisoners I went up in the mountains.
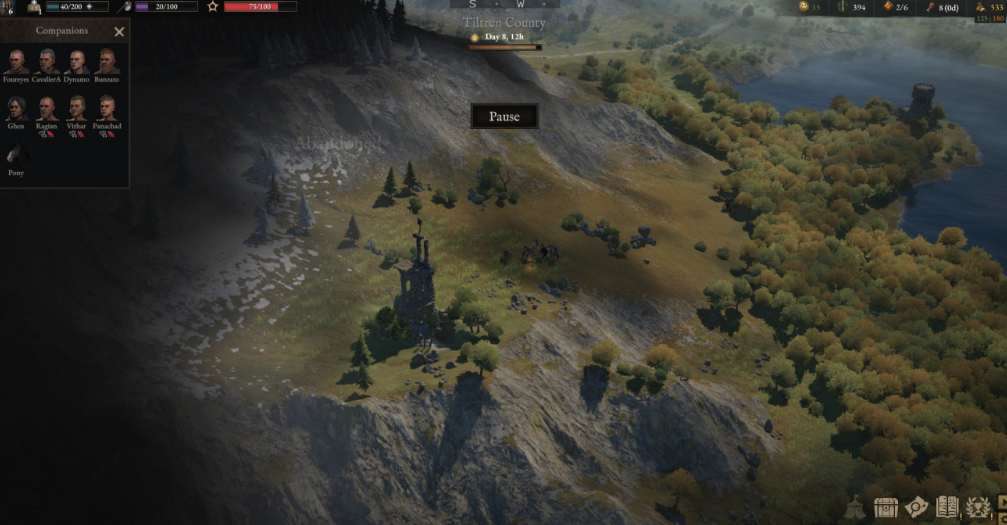
I will visit the Abandoned Tower later. I placed two pistons and climbed down again. I like having pistons here:
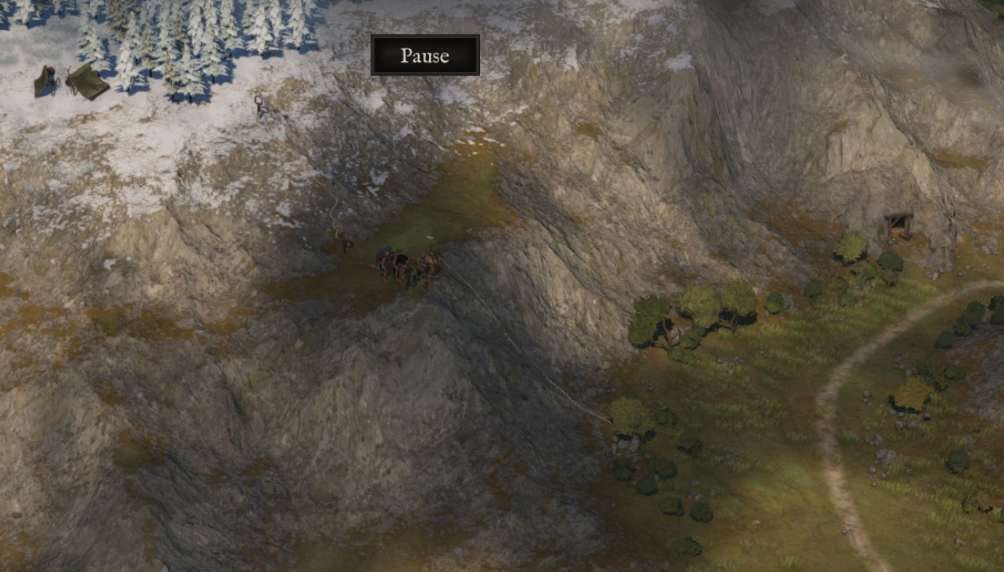
Those two pistons will come in handy. Note that once placed pistons allow you to climb up too. Since my party had no food at this point I had to get back to Stromkapp. A guard patrol forced me to take a detour, but eventually I made it back, to collect my reward from the emissary and to accept a new contract. I was a bit tempted to hire another companion at the inn, but this early in the game it is better to focus on trying to equip the mercenaries that you already have.
I had picked up a bit of iron ore when I ran around earlier, hence used a KP to unlock helmets. (Originally, there were no helmets in Wartales, but people kept asking for them until the devs provided). Crafting two helmets gave me another KP, but since I was not sure about what I wanted Isaved it for later. I then visited the market. The merchant on the square there will always sell leather and hemp, but it is possible to replace two of his other wares. In this case if I buy the 11 salt and the 9 fish oil the merchant will start stocking something else in those slots. Perhaps something more useful like iron ore (iron veins refill slowly, especially on Extreme difficulty).
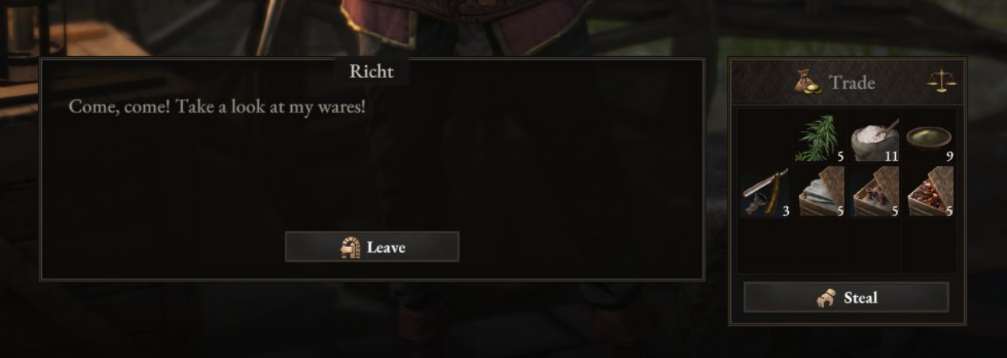
Since I really needed food, I allowed one of my prisoners to become a cook, bought food from the innkeeper plus all nasty vegetables, salt, and all wheat I could get from the market. At this point, you might as well get what you need for your tinkerer to craft a Hitching Post. The cook then made bread. If you played through the game and had a similar experience as I did, this is also a good time to get some Raw Materials from the smith at the Forge. I let my Alchemist create Energising Oil at the Apothecary (and applied it to the iron weapons I had) before I allowed my party to rest. Since I had almost 400 gold, I felt that I could pay 63 to rest at the inn (no risk of being attacked and no need to feed your party). Then I went back to jail again and handed in as many outlaws as the warden accepted. That pulled my Sus low enough for my party to no longer be Wanted. The warden probably thought that I had started to behave again, but I immediately stole an item that I had sold to her earlier. Levelling up the path Crime and Chaos takes time – start stealing stuff early in the game. Since I already had a Camp Chest, I placed my two stolen items in it and dragged my thief to it. Once assigned to the chest, the thief will launder stolen items placed in it. The current popup is misleading – nothing is sold automatically.
Since I was close to the Abandoned Tower again, I decided to visit it. You can find hemp and a man, Claes, there. He is a blacksmith and you have two options: Either you return with him to the Forge or you take him to the Haven. Note that if you let Claes join, you risk being attacked by the people that chase him, Laheart’s men (they run around with blue icons). I take him to the Haven. Open the map, there should be a purple circle on the map by now, that is where the Haven is. My party got attacked by wolves, while tired, during a snowstorm! However, it was not too troublesome. After the fight, it was time for another rest. My Warrior and Pugilist had also levelled up, a good opportunity for me to spend 2 KP on Career Plans. I want everyone in my party to have Willpower (Wp) 15+ since that allows them to survive one mortal blow. My Warrior had reached level 3 and had to pick between Defensive Stance, Valorous Chain and Valorous Duel. Defensive Stance is rather awkward to use and I would not recommend it. If your Warrior uses a two-handed axe you can go with Valorous Chain, otherwise go with Valorous Duel. In contrast to what you may think, the Pugilist’s damage depends on its Dexterity, not its Strength, keep that in mind.
After the rest, it was time to appoint a Captain. Naturally, there was just one choice: Foureyes! Close to the Haven, I ran into Laheart’s men and decided to engage. Death before dishonour! They have Legionnaires and Sappers. Their leader also hits hard (as usual). These enemies are annoying. The Sappers set up overwatch zones, and the Legionnaires have swords with knockback, hence they can push your companions into overwatch zones. Try to get rid of the Sappers first so that your units can move around without having to worry about getting shot. This can be a rough fight so do not hesitate to use a torch or throwing weapons. In addition, try to avoid letting your companions bleed … because every turn they start bleeding they risk getting a negative trait. My Ranger levelled up after the fight. Cutthroat, Strategist, and Poisoner are all good. However, I like my first Ranger to be a Strategist. This is my personal preference. His smokescreen is very useful (once upgraded it also provokes knockback).
Talk to Sehra at the Haven and hand over Claes – leave the Haven and enter it again, now you can see Claes standing there – he can repair your armour and sells Raw Materials. There is a locked chest on the top floor. Pick the lock and take everything. Sell excessive weapons and armour to the merchant, and consider stealing something. I bought all her Snow Iris flowers except one – I stole the last one and placed it in the Camp Chest. Finally, talk to Fergas and accept his proposal. This is a good time to check the Paths. If you played exactly as I did (rather unlikely) then you can now level up Mysteries and Wisdom and spend one point on a perk. I picked Endurance Run since I expect the guard to chase after me soon again.
Fergas wants you to go to the woodcutter camp and I do not mind doing that. If you took the same way to the Haven as I did, you went past it before. Talk to Anthas at the woodcutter camp to trigger a fight. I ended up having to deal with a band of Deserters before I could get to it, but just henchmen and raiders again – no problem. In addition, my new captain’s ability to Galvanise Troops (generate VP) makes battles a bit easier.
My Archer reached level 3 after the fight with the Deserters. This presents a difficult choice. I am not overly fond of having animals in my party, hence Beastmaster was not really an option, but Hunter and Infantryman are both good. I went with Hunter – the knockback can come in handy. It can push back annoying enemies just far enough for them to be unable to hit one of your companions (etc.). However, my Archer is still running around with the level 1 bow he started with. Note to self: Craft a longbow.
Time to deal with the other fight. Naturally, I side with the refugees and fight the evil guards that want to cut down the forest and get firewood so their children do not freeze to death. Besides, the Tules are bound to be real. (A Swedish folklorist once provoked a Letter to the Editor from a rather famous author – he argued that gnomes were real – he knew, because he had seen them).
This fight was the first in this campaign in which a very important character (VIP) was present – you lose if he dies during the battle. At this point the guard only had Phalanx Soldiers with spears and Foot Soldiers with swords. Not too troublesome. However, check out the guard captain’s hat. It has Enhanced Visibility – this means that if you engage him in melee he will counter attack once. In addition, due to him being a guard captain he grants everyone +50% movement as long as he is alive. New players hate that, especially since the captain is likely to shot and run away. Inexperienced players chase after – it is better to move back and gather your troop, force the captain to waste movement running towards your companions.
In addition to the VIP I started with a hoodlum – he pulled the short straw and agreed to distract three guards while I dealt with the rest. There is no need for any fancy tactics – worry about the enemies that have not acted and what they can do – think about how you can do damage and generate VP. The VIP, a ringleader grants your troop a buff, +30% critical chance, so the fight should not be too hard. Remember to visit the woodcutter camp again afterwards and talk to Anthas to get your reward.
My Swordsman reached level 3 after the fight. As I wrote before Defensive Stance is awkward, pick one of the other options – depending on whether he uses a onehanded or a twohanded sword.
Since I had three captured outlaws it was time to visit jail again (there is a lot of running back and forth in Wartales). Handing in the outlaws made my Sus go down to 0 so I stole a gem that I had sold to the warden before. Remember to put stolen items in the Camp Chest so that the assigned thief can launder them. I noticed that I could now level up my Crime and Chaos path and hence had a perk point to spend. Many tempting options, but I went with Nimble Fingers because I intend to steal much more.
My troop could barely carry more stuff so it was time to head back to Stromkapp. It was a good opportunity for my Alchemist to craft medicine and oils. Try to craft everything at least once to get as much knowledge as you can. Thanks to my Alchemist I got a KP to spare. Since I needed a Longbow I spent it on Weapons III and crafted one.
I had a contract to clear out the Pedra Mountain Mine in the south, and this suited me well since I need iron ore to craft better armour. Your Swordsman needs heavy armour to be able to tank properly. The fight in the mine should not be a problem, just some Deserters again. Try to capture three. I let one of my new prisoners mine the iron ore and after that everyone needed a rest. After the rest it was time to appoint a Lieutenant, I like this to be a unit that is likely to start turns unengaged, in my case either the Archer or the Ranger. It felt appropriate to let my Strategist become my NCO.
I followed the road east, to Old Wilburt’s Sheepfold. Talk to the ladies there, agree to help both. The old lady gives you the Mutton Stew Recipe if you give her 10 wood. Make sure to get that recipe before you do the other lady’s quest because if you pick the “wrong” choice during that you will lose the chance to get that recipe and you cannot get it elsewhere. The Ornate Key in the chest at the Sheepfold is for a hatch in Arthes – do not worry about it now, steal it later.
I had a contract to find the Tiltren Tomb and went up to do that. You need to click on the tomb and see the entrance for the contract to count as completed. There is a merchant outside the tomb, he sells torches, rope, grease and cloth. Get the grease and the cloth. You need torches if you want to explore the tomb. I prefer doing that later. Instead I went to the fishery. The young lady that gave you a quest before and old Wilburt argue when you get there and you need to decide what to do. If you side with Wilburt and kill the young lady the refugees at his sheepfold will leave and if you did not get the recipe you have now lost your chance. I took a risk here and threatened Wilburt. In real life I might have negotiated, but in Wartales I am the brutal mercenary captain Foureyes – you do as you are told old man and be glad that you do not get to sleep with the fishes! I ended up being Wanted by the guard for that, but that is life. The lady gave me a medallion, +1 Wp (use it to get a companion’s Wp to 15). If you decide to kill the lady note that she counts as a leader unit, hence try to let a companion that does not already have the trait Glorious make the killing blow.
It was time to return to Stromkapp once again. The guards had heard about my recent diplomatic intervention and wanted a word. My party decided to run into the city instead. (If you are hunted by the guard enter a city and watch the guard patrols leave or walk by). I felt a bit temped when I checked out the traits of the mercenaries at the inn, but 7 Wp is nothing to write home about. I like new recruits to have at least 10 Wp. However, I picked up new contracts, to kill bandits and to help a group of noob hunters. I also spent a KP on Armour and crafted Reinforced Plate Armour – someone needs to be able to tank. That gave me another KP, I took Weapons IV and crafted an Iron Katar from my Pugalist. Wartales is usually not an overly difficult game, once you are learned to play it, but you are expected to replace old gear as often as you can. The merchant at the market had started to sell sandstone and rope in the slots I emptied before – not what I wanted in those slots, hence I bought all. The Apothecary had a discount on Sharpening Oil (+10% critical hit chance), rather useful so I bought it – it will come in handy later. Then it was time to teach one of my prisoners to cook, I needed someone to learn how to make Mutton Stew. That stew gives +15% Str!
Since my party was wanted by the guard due to some unfortunate wording I thought it best to let them deliver the prisoners to jail before I went west, past the lumbermill, to the trackers’ camp. I noticed that the path Power and Glory had reached level 2 and spent my perk point on Art of the Forge. Unfortunately, I had to rest on my way to the trackers’ camp and a guard patrol stopped to say hello … I decided to fight them. This time they had Lieutenants – one of the most annoying types of enemies in the game! They run across half the map and inflict bleeding if their attacks damage armour. I killed the guard captain first (use Protection before you engage him), that gave me time to deal with half the guards before the other half of them could engage. (Applying Tactical Order on your Captain with your Lieutenant and then using Galvanising Troops is a classic). Level 3 guards are not too troublesome, but served as a reminder that a Pugalist in Rags should not tank. The fight went well, but I got 120 Sus from fighting the guards – so best to behave (for a while). My Pugalist levelled up, all subclasses: Wrestler, Bruiser and Slayer strikes me as good. However, the Slayer felt more interesting than the others so I went with that.
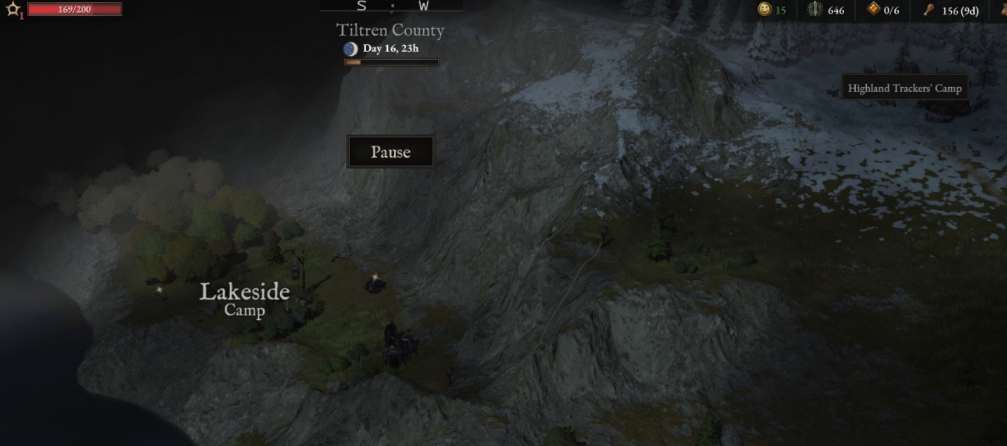
I let my tinkerer craft a piton so I climb down and visit the Lakeside camp. Menexos there is a hard worker and just happens to sell stolen items – buy one from each stack and place in your Camp Chest. I realized that I could also let my tinkerer craft a Strategy Table (assign your captain to it and right click on the table to select a tactic – since I use smokescreen I pick Opportunism). In general, if you find yourself having too much loot check what you can craft before you consider selling or throwing something. My Ranger decided that he wanted to enlighten us all and asked for a torch.
Time to visit the trackers’ camp. You can chop wood there, but make sure to speak with Brennan and accept his quest. There is a merchant there too, but this early in the game you are not going to have enough fangs to buy much and the druid will not paint your face with war paint since you have not been initiated (yet). I found some bandits in the forest near the camp and saw my chance to ambush them (this helps levelling up the Crime and Chaos path and I needed outlaw prisoners due to my unfortunate interaction with the guards). This time the bandits had Marauders – the guys with the twohanded axes – they automatically score a critical hit if the target is poisoned – watch out! The also had Scroundels (bandit pugalists), but I think it is best to worry about the Marauders first. After that battle I had some new friends – in chains.
Finding the noob hunters nearby was not hard. I persuaded them to go home and leave the hunting to the pros … Speaking about noobs, my party needed to rest once again and a guard patrol dropped by to say hello. I decided to fight again, but this can turn into a vicious spiral, because every time you fight the guard your Sus increases and you end up being more likely to get caught by the guards. That fight was actually about to go horrible, but a well placed smokescreen and a bit of luck lead to victory. I got a War Bow from the fight – those bows lets the archer twice if he scores a critical hit. In other words, a perfect bow for Sharpening Oil. After having seen the battle my little pony decided to level up and become a work pony.
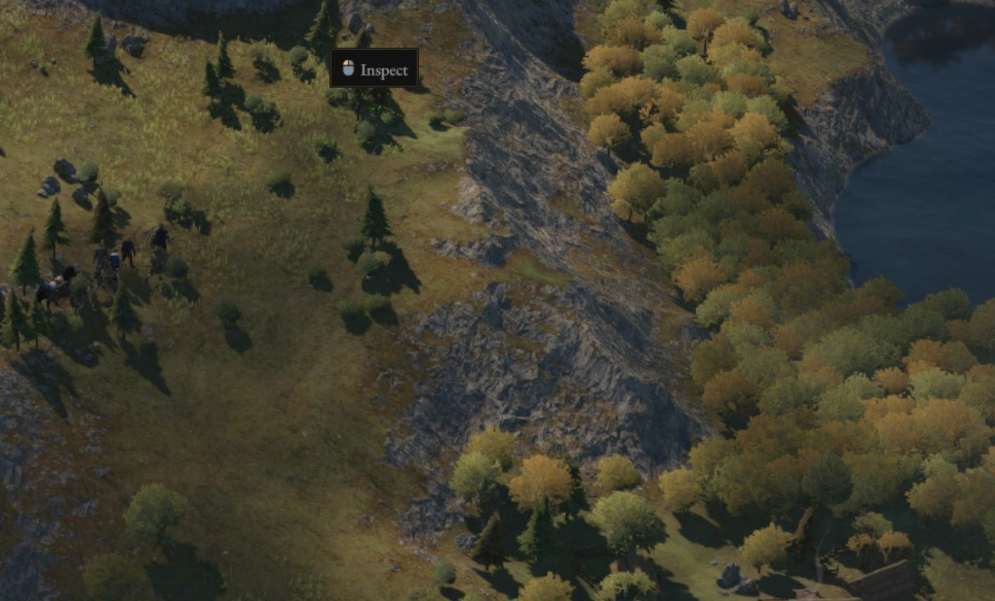
As you play the game, you gradually learn where everything is. There is some leather close to the Wealthy Farm, look for the smoke. Talk to the people at the Wealthy Farm and accept the quest. … as if to prove my earlier point, a guard patrol managed to catch up with my party when my guys and gals were tired. I decided to fight anyway – would not recommend. The guards had reinforcements, including a Defender – every time he takes a critical hit in melee range he replies with an attack of opportunity, and a Tactician – if he ends his turn engaged he performs an attack of opportunity and disengages. In these kinds of situations, try to take out the guard captain first to buy yourself time. The captain’s movement buff otherwise causes everyone and their grandmother to engage your companions. Eventually, I won, but it was the kind of fight that could have ended an Ironman run. 4/5 companions injured and 380 Sus – learn from my mistakes! However, my team made it back to Stromkapp, to cook more Mutton Stew and get healed at the Apothecary. Then I snuck back to jail again to turn in my prisoners – 300 Sus afterwards … meant that I had to be careful.
Mount Altis is the Wartales counterpart to Mexico – a good place to visit if you are wanted by the guards. The easiest way to get to Mount Altis in the early game is to return to the Haven. On the way there, I stopped to clear out the Mount Altis Tower (above the salt mine). There is a skull over the tower because the bandits here are connected to the Bandit Lair in the region. In every region, there is a Bandit Lair and three groups of bandits with skulls. If you attack the lair and the groups with skulls are still alive, then the bandits will get reinforcements.
For me, the fight at the tower occurred during a snowstorm. Be a bit careful when you fight during snowstorms – hidden enemies can emerge from the fog. My Archer started the battle by demonstrating that Hunter is a good subclass – the Recoil Shot causes knockback and slowdown – it made the Marauder unable to reach my companions. Keep an eye out for flowers on the battlefield. A Snow Iris can remove bleeding, poison, and burning. Nice flower.
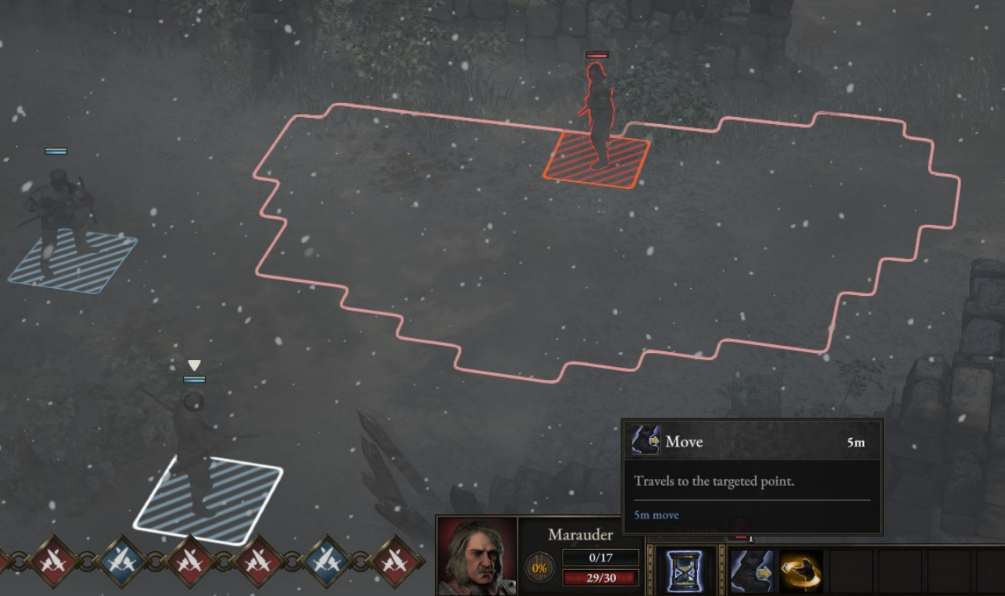
There are two locked boxes at the tower. Hold down Alt to highlight them. One contains a military report (+1 KP) so pick the locks. If you hate lockpicking I got some bad news for you – you will need to pick a lot of locks if you want to level up the Crime and Chaos path all the way. Lockpicking is something that you learn gradually, do not stress when you do it, listen and look how far the lockpick goes in. You want to push it in when you hear no sound of resistance. After the battle it was time to rest once again. I realized that I had forgot to let my tinkerer craft a Banner so I did that. The Banner allows you to activate resolutions. They are a bit situational, but can be very good. I like to use Thirst for Knowledge when I am entering a new region or is about to craft several new items. Coordinated Gathering is naturally good if you are exploring an area that you have not been in before. Expected Profits is for the situations in which you got more loot than you can carry. Finally, Swift Progress gives more XP from combat.
To get to Mount Altis return to the Haven, find the nearby Rat Nest and walk past it and continue onwards. It is a nice area to chill in when you are wanted by the guard or so I thought. Naturally, a pack of wolves welcomed me. There are only three buildings in the Mount Altis region: an inn, an arena and a gatehouse on the border to another region, a hostile swamp Ludern. It is not known as a destination favoured by tourists. Since I had some spare resources I bought the Brewing Vat recipe at the inn and crafted it (I am not going to use it until I have a bigger party). I had two KP, hence I felt that the time was right for Dynamo, my Ranger, to become a sociopath! I spent the KP on Misanthropic Troop and allowed Dynamo to insult a companion through the relationship menu (accessible from the character sheet, click on the icon close to the feet) and become a sociopath. In Wartales sociopaths deal extra damage for every negative relationship they have!
My party came to Mount Altis to chill, but also to pick up an item. There is a camp in the mountains, close to the Abandoned Tower. Make sure to inspect that camp, because a Pocket Knife lies there (+15% critical damage!). Place a piton there so you can return to Tiltren. Since I still had 270 Sus I decided to explore the other mountain in the Mount Altis region, but boars decided to be boaring and attacked. Against level 3 boars there is mainly one thing to keep in mind – if you kill one the others gain Fury and hit harder.
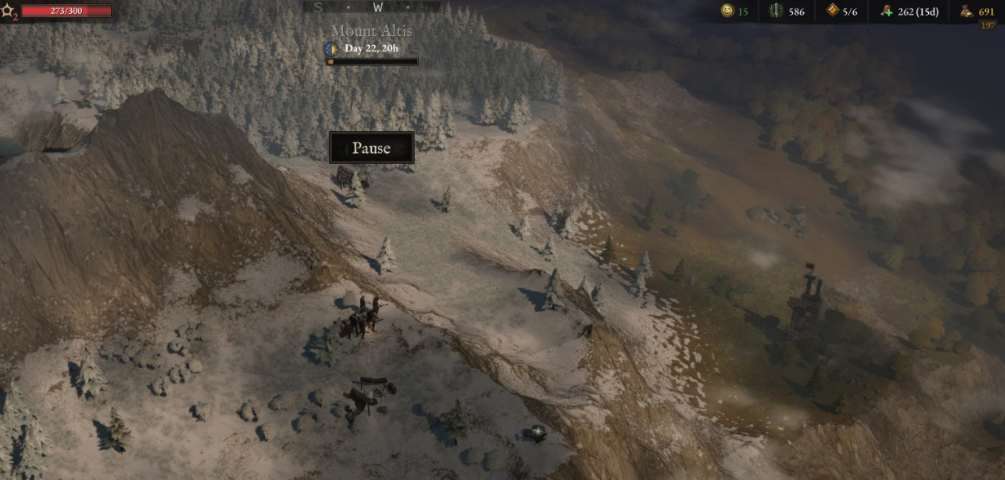
The Arena of Legends is on top of the other mountain. There is nothing for me to do at the arena yet, but it is possible to place a piton nearby and climb down into Ludern. There is a twohanded sword down there – I will pick it up later. Ludern is a dangerous region. You have been warned. I climbed down and to the gatehouse at the border between the Mount Altis region and Ludern.
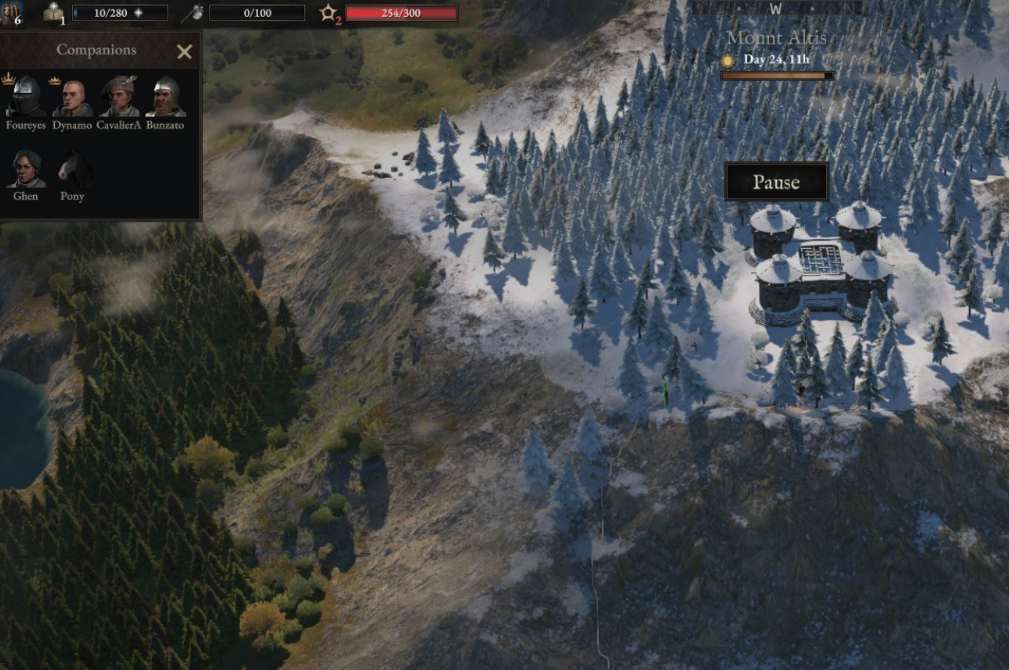
The gatehouse is controlled by Bandits – do not pet the crocswine. Naturally, I am not paying mere bandits to cross the border – attack! I faced 8 bandits plus reinforcements, but the bandits were separated into two groups. I had two options either place my companions between the groups in order to be able to reach the ringleader and take her out or to place my companions so that half of the bandits were unable to reach me during their first turn. I opted for the latter. The bandits were level 3 just like my companions – the early game with Extreme difficulty used to be much harder!
In fact, the only challenge was keeping the outlaws alive long enough for my companions to capture four. My Warrior reached level 4 after the battle. Make sure to inspect the body after the battle – it has a Golden Key – the only spare key in the game!
I intended to start the journey back to the Tiltren jail, but immediately ran into another group of bandits – no problem. My sociopathic Ranger reached level 4 after the battle. Well deserved. However, I noticed that he was still running around with a level 1 Damaged Dagger! My party found a shortcut to Tiltren and passed the Woodland Farm on their way to jail.
I did my best to avoid combat on my way to jail, but needless to say, a few meters from jail when my guys and gals were tired a band of level 5 bandits appeared from the forest. I think RNGesus heard my complaint about the game being easy (level 5 bandits because two of my companions had just levelled up). I admit that I was tempted to negotiate with the bandits for once, but six bandits without a leader. Surely I should manage? One of the enemies had a star – seasoned. Such enemies have stat boosts and cannot be captured. The bandit faction passive also kicked in, Oath of Cowards – bandits now deal extra damage to engaged companions and they are regarded as priority targets. Stay single! Thanks to my Archer’s Recoil Shot the seasoned bandit never got a chance to show how hard he can hit, but beware of enemies with stars. My Swordsman and Archer decided to level up after the battle.
After having forced a prisoner to cook for my team I paid their wages, turned in the outlaws to jail and sold the loot I did not need. Given that enemies are now stronger it was time to revisit the salt mine to check if a iron vein had refilled, then onwards to Stromkapp to craft gear. (One vein had refilled at Day 27). I had to make a tactical withdrawal to avoid an unnecessary encounter. Naturally, I made a new dagger for my Ranger. After some crafting and cooking it was time to deal with contracts again. However, I wanted to do the “Tiltren Hunt” first. If you have accepted Brennan’s quest at the trackers’ camp then there is a body outside the stables – click on it an a bloody trail will appear. It will lead to Sikha and her pack of wolves.
During Early Access Sikha killed a lot of mercenaries, but she is not as dangerous anymore. She and her pack were still level 3 when I faced her – not too troublesome. In fact, my companions took no damage at all. Killing Sikha is one of the quests you want to make sure that you have done before you leave Tiltren and start adventuring in another region. The reward is an armour layer and you want the option to craft every armour layer that the game has.
Time to visit the nearby Lakeside Camp and deal with the quest I picked up at the Wealthy Farm before. The guards there have captured a thief and I am about to talk to his friends. I found some Beer-infused Wolf Ribs (+20% critical damage) during my vacation in the Mount Altis region. Now was a good time to let my team taste them. At the Lakeside Camp talk to Isabeth and warn her. She and the others run to the Wealthy Farm. You can take the alcohol they left behind. I went to the trackers’ camp first to pick up my reward and spent the fangs I had on White Leather – you will need a lot of it later. Speak of the devil, a ghost pack appeared in the forest. Ghost packs only spawn at night in a white fog. I ain’t afraid of no ghost, hence attacked. I faced five level 5 ghost animals. When ghost animals attack they apply terror to your companions – if one gets 5 terror he runs like a coward. On extreme difficulty a companion running from combat will be found dead afterwards. You either understand the terror mechanic or you learn it the hard way. To reduce terror a companion needs to kill one of the ghost animals. By the way, they get reinforcements. A Nightmare and more ghost animals appeared during the second turn. Nightmares inflict Binding of Terror – make sure to hover over that ability to understand how it works. In addition, every time you hit the Nightmare the responsible companion gets 1 Terror – taking it out can need a bit of planning. During the fight my sociopathic Ranger accidentally hit two of his companions with a torch.
After a guard provoked detour my party eventually reached the wealthy farm. Here you need to make a choice Attacking Isabeth gives an Adjustable Strap (+1 movement) and attacking Oddi gives a Bar of Soap (reduces Sus from theft). That Bar of Soap is much better – if you intend to level up the Crime and Chaos path. If you side with Isabeth and attack the guards you start the fight with her, a ringleader, and a hoodlum, eager to serve as a distraction. Isabeth is a VIP and is not allowed to die. She grants your companions her buff +30% critical hit chance during the battle. For my Archer that meant more than 50% chance to fire two arrows at the same target thanks to his War Bow. I expected to face level 5 guards, but, fortunately, they were only level 3, hence not too troublesome.
This was the last story quest in the region, meaning that I need to prepare for a final fight. Fergas sent a message, asking me to come for tea and have chat. I knew what he wanted! I had to visit Stromkapp first for some cooking, crafting, healing, and repairing. Then onwards to the stables to check if a Brawny pony was for sale – not this time. I turned in a prisoner to jail and saw a Quick, Cowardly, Glutton wolf behind the bars. After that my party went to the Haven to talk to Fergas. If you play on Extreme difficulty you may struggle a bit to get enough Raw Materials – remember that the blacksmith Claes, in the Haven, sells them if you handed him over to the refugees. Fergas has realized that staying in the ruins is not an adequate longterm solution, hence wants your help to talk the mayorness in the region. Prepare for battle and return to Stromkapp.
There is no rush to return to Stromkapp, hence if you played like I did you might as well do the contracts you accepted first … A group of level 6 guards emerged from a forest to have a word with me once again. The faction passive kicks in once enemies are level 5 or higher. NB: For the guards this means Forced Disengagement. In general, when you face higher level enemies do not be afraid to spend your VP – you will need to do so. In Wartales you are meant to spend and generate VP during battle. I had almost 200 Sus after the battle and paid Claes to repair my armour. Given my Sus it was time to capture outlaws again. I ambushed a group of Deserters. In addition to the familiar units they now also had a Bomber and a Renegade. Inexperienced players tend to hate the Bombers because they do area of effect damage and sets everyone on fire. It is often a good idea to engage them immediately (during Early Access if they were engaged they would set fire to themselves when it was their turn to act – understandable – now they only punch). Unfortunately, I ended up killing everyone before I could take prisoners.
It can get a bit tiresome to be wanted by the guard – I recommend putting pitons here and there – they can really help you get away from pesky guard patrols. I dealt with my outstanding contracts – killing outlaws – not too interesting. Dynamo my sociopathic Ranger dealt 86 damage with a critical hit – that is acceptable! (Afterwards he rightly wondered why he had to do all the killing). I also visited the shipwreck and paid the carpenter to fix it. The ship allows you to explore Belerion, however, this should be regarded as end game content and you need to have the Pirates of Belerion DLC. I took the time to place pitons close to the gatehouse between Arthes and Tiltren. One piton allows me to climb down to Arthes and the other into Tiltren. This is an old trick.
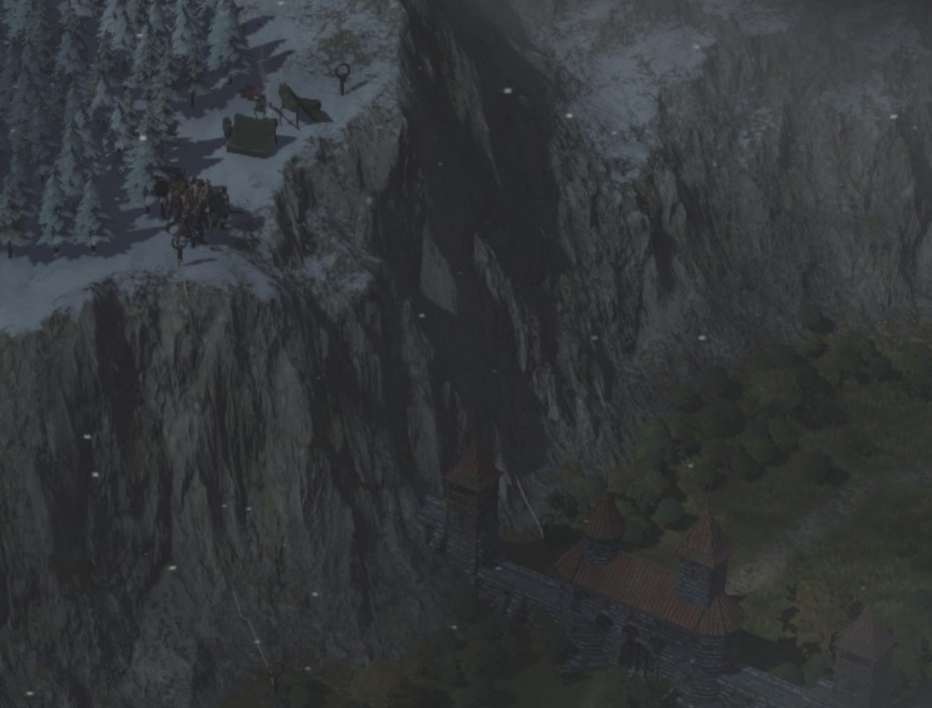
Before returning to Stromkapp to collect my rewards for completed contracts I went to jail and turned in outlaws and my suddenly I was no longer wanted by the guard! Finally. Now I could steal again. 1 month, 8 days in the campaign without having completed most quests in Tiltren means that I have been a bit slow, but some is due to the detour to the Mount Altis region. It is possible to do most things in Tiltren during a month. I like to leave Tiltren and explore another region when my companions are level 5 – right now everyone is level 4.
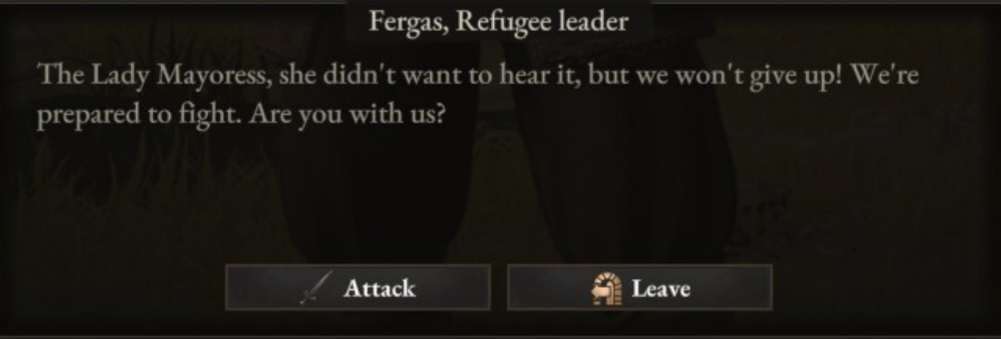
What choice do I have Fergas? I sided with the refugees in four of the five story quests, hence end up fighting the guard in the final region story battle. Fergas is a VIP in the battle and gives a 30% critical chance buff, thanks to it the battle should not be too hard. However, there are poison clouds and fire to watch out for. Fergas likes running through both. In addition, be mindful of the guards’ faction passive: Forced Disengagement. In addition, note that the Tacticians have fancy hats that allow them to counter with an attack of opportunity if one of your companions engages. Soften them up with an Archer or throwing weapon first so they never get the chance to hit back. I like to start the fight by slowing down the Lieutenant with a Recoil Shot.
Do not waste Raw Materials to repair your armour after the battle – pay the blacksmith at the Forge to repair it. After the battle the blacksmith also sells a book, Tiltren Restoration, make sure to buy and read it. As a reward for having helped the refugees in the battle Fergas gives you a border pass – it allows you to get into Vertruse (Wartales version of France) without having to pay. There is no need to waste the border pass by using it to enter Arthes, since you can get there through the mountains. For players that play with Adaptive Exploration the game has kinda opened up. I think it is a good time to slow down and assess the situation. Level up paths, craft camp equipment (even if you do not need it right now), and make Mutton Stew. Note that the beggar you gave food to long ago is now a merchant and sells honey etc. The path Mysteries and Wisdom may be at level 4 by now, allowing your tinkerer to craft a lectern. A scholar assigned to it will generate a bit of knowledge during every rest – extra knowledge if you spend a perk point on Archivist like I did.
I picked up contracts to inform Cortia (in Arthes), loot the Bandits’ Lair, and kill a group of bandits. One of the bandit groups with a skull, that provides reinforcements to the Bandits’ Lair is running around in the forest between the stables and Old Wilburt’s Sheepfold – people sometimes miss that group. I decided to take care of it first. The final group of bandits with a skull is hiding in the old lighthouse, close to the sea.
The Bandits had a Wrongdoer – inexperienced players are not fond of them because every time you hit them in melee the attacker gets inflicted with 1 poison and their shields have Arrow Defence – reduces damage from arrows by 90%. They also got heavy armour. The way to deal with them is to apply Destabilisation first, either with a Fighter (Swordsman subclass) or with a Spearman then slap them and use First Aid if necessary to get rid of the poison. Fortunately, after the battle I got the Wrongdoer’s shield. Perfect for the region boss fight in Arthes …
After having dealt with the bandits in the old lighthouse it was time to loot the Bandits’ Lair. It is located, in the mountains between the tomb and the gatehouse. After the battle make sure to loot all three boxes – there should be some nice items here – and get the medallion from the corpse – you need to give it to Kristina Lund if you want to complete all quests in the region. I really needed iron ore so I took a trip to the beach and explored the area at the feet of the mountains. I realized that I also really needed another pony, having the Camp Chest full of level 6 items that I cannot use yet. So, I returned the medallion, bought another pony, handed outlaws to jail (somewhat ironically, this helps levelling up Crime and Chaos), and then went to Stromkapp after a brief skirmish with a group of bandits.
Since I had a contract to inform Cortia I bought some trade goods in Stromkapp, hoping to make profit by selling them in Cortia. People sometimes wonder how they should complete this kind of contracts – you are meant to speak to the informant at the tavern and click Inform, When you consider selling trade goods, hover over the scales to see a Trade Goods Ledger – it allows you to see what you paid for the trade goods. A Solitary and Strong Brute caught my eye in the tavern. I recruited him and made him my cook. Since I only had one truly tanky character in heavy armour, I let the Brute be a Destroyer and had to use almost all iron ore I had to craft his gear. Running around with a level 3 character in rags when you face level 6 enemies is not recommended.
I wanted to return to Tiltren and do the last quests, hence bought trade goods to sell in Stromkapp. On my way back I captured some outlaws, then went past Sehra’s Sheepfold, up in the mountains to pick up a mastery book that the sneaky devs have left close to the lake. A mastery book allows a companion to upgrade one skill. I like to upgrade Recoil Shot.
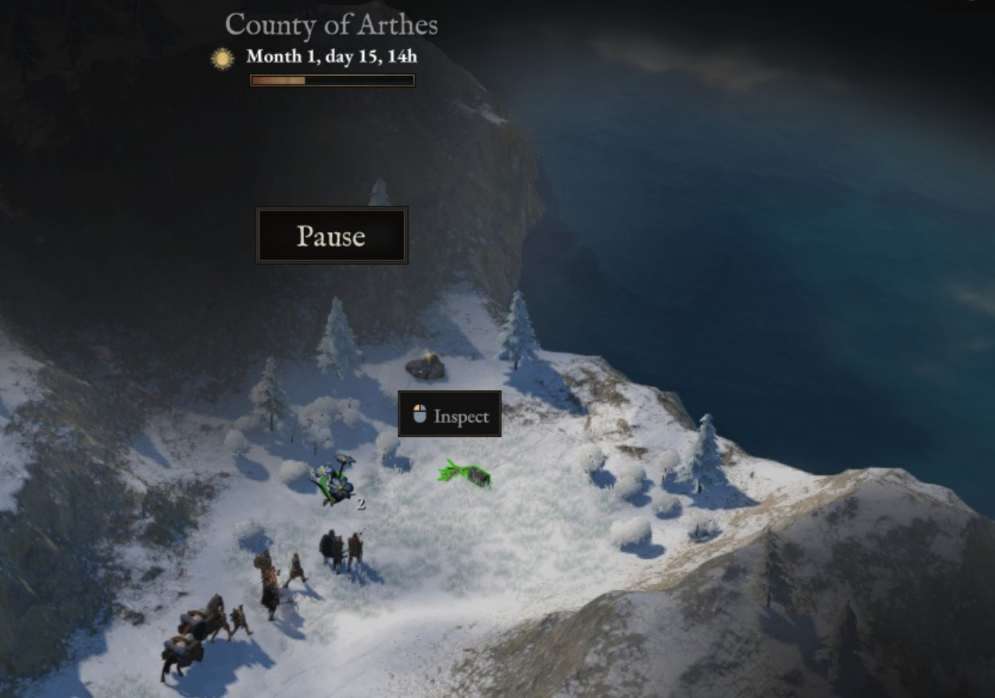
My thief decided to steal three dolls on the way back to Stromkapp – I do not know why, but I am not judging. I really want Crime and Chaos to reach level 4 – this is a power spike because it gives access to cheap books that allow your companions to learn First Aid etc., given this goal I spent KP on Specialised Training. It allows you to level up all paths a bit faster. Having companions reach level 5 is also a power spike, it allows them to equip ghost gear. In addition, by then you should have a collection of gear that you have been unable to equip (if you are playing with Adaptive Exploration). After the usual cooking and crafting, and a visit to jail, I decided to finally accept a contract to kill Mathias Lund. I also noticed a contract with a portrait and gold borders – those contracts give a so-called community bounty weapon as loot. They are unique and can be upgraded. I saved that contract.
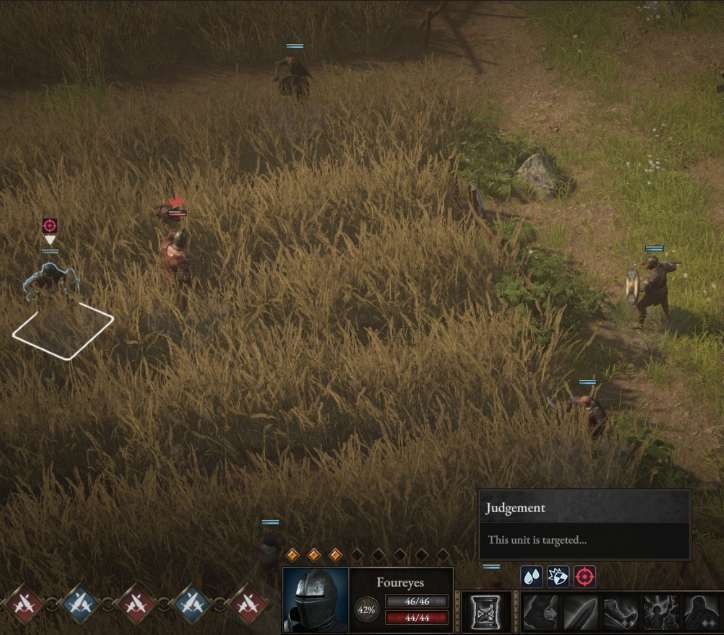
New players sometimes struggle when they face Mathias Lund – they need to understand that the fight is a puzzle. He applies Lucilla’s Judgement to the closest enemy and will then set up to target that companion. That mercenary should be a companion with a shield that has used Protection – it allows your guys and gals to survive hits that would otherwise kill them immediately. Note that Lund cannot be engaged, but he can be weakened with taunt. This is an easy fight – once you know what to do and in which order.
After the fight you get a legendary weapon Lucilla. Some say that it is worthless, but that is not true. It is however a bit awkward to use, because it needs one turn to set up. One way to use it is to give it to a Brute, have him run up and engage an enemy, target the enemy, and then you trigger the attack with a smokescreen. Another way is to give it to a Brute with the subclass Vanguard – their special ability allows them to get in a good position – move the Vanguard last during your round and set up the attack, and at the start of next run use you Vanguard first.
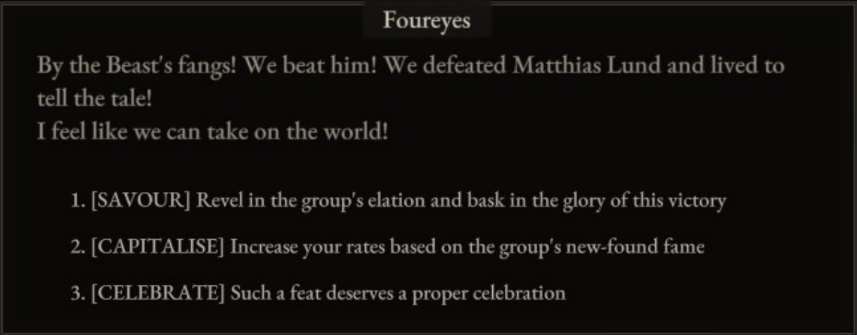
On my way back to Stromkapp I decided that it was time to get rid of the drunkards that run around close to the salt mine. Note that the Tacticians hit hard, but the Lieutenants are more annoying. Lieutenants run to hit more than one target if they can. Tacticians are most likely to go after the closest target. This time the Tactician had a throwing knife, thus I can expect to see enemies with throwing weapons henceforth.
I had a contract to kill some nearby bandits and found myself facing 9 level 5 outlaws, including a ringleader. The battles are truly starting to become more interesting at this point. A companion with a twohanded weapon could do much good in this kind of fight. In next fight against bandits the throwing weapons the enemies now use proved to be rather deadly. After the fight one of my companions needed just 20 XP to reach level 5. I was ready to fight anything .. a pack of boars walked by … and meat was back on the menu. Boars have a faction passive that grants them riposte (if an engaged companion attacks it the boar replies with an attack). Knockback can be used to cancel riposte. The alchemist can craft bombs that provoke knockback, they can come in handy now and then, but I prefer hand bomblets. After the battle my Warrior finally reached level 5 – I picked Madness, it should help him finish enemies. However, being able to equip a better axe should help more.
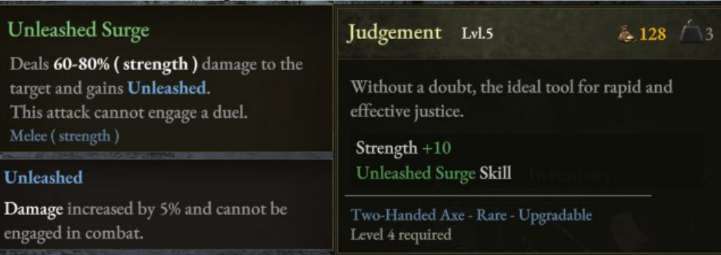
I accepted the contract with the golden borders, hoping for an useful community bounty weapon. For normal contracts you see a small red circle on the map around the target, but for these there is a huge red circle and you have to search the area. Once I caught up with her I learned that Eligann had an amusing accent and a big axe, Judgement. Unfortunately, that axe is a bit awkward to use. Its special ability makes enemies unable to engage the wearer and it targets only one enemy. This makes it difficult for the wearer to generate VP.
My Ranger reached level 5 after the fight and picked Instinctive Throw – one of my favourite abilities – after every action the Ranger throws a knife. During the game the damage from it gradually increases and it is great against enemies with dodge and for finishing enemies.
The game had realized that two of my companions had levelled up, because suddenly I found myself facing level 7 Deserters. After that fight my Archer and Swordsman also reached level 5. my Archer took Precision – applies vulnerability every 2 attack (vulnerability = next attack will crit). Picking a passive for my Swordsman was harder, but I went with Counter-attack. I noticed that my Crime and Chaos path had also finally enough points for it to reach level 4! This is important because at this level a black market agent spawns at the Bandit Lair – he sells stolen skill books that allows your companions to learn First Aid etc. I went there immediately and bought every book he had. I like to let my thief launder them before someone gets to use a book, but they are immediately useable.
I ran into a level 7 ghost pack and got to see the first ghost bear in this campaign. Suffice to say, they hit hard and have lots of hit points. Try to use things that affect % of hit points when you fight bears, bleeding, poison and burning. My Ranger had hand bomblets and did massive damage. The bear dropped a Colossal Paw – save that, you need it later in the game.
Since the campaign was going well I felt the need to take a risk and let my thief steal a Hothead’s Galea from a travelling merchant – and suddenly I was wanted by the guards again. However, more importantly, that helmet looks cool. I was not too worried about being wanted this time, since a new resolution, Faking Innocence (can be activated from the banner in camp).
I picked up another community bounty quest with gold borders, killing Eitlingarde and her followers. They are Alazarians and talk in a funny way. When a new player encounters a new faction it is best to slow down a bit and take the time to check the character sheets to see what the enemies can do and how they function. The Mace-bearers are among the more annoying, they carry shields that automatically makes counter with an attack if their engaged opponent hits them – Pugalists, in particular, should watch out. The Sagittarius however it the most annoying, he uses his bow to sling mud over a large area slowing your units down. Eitlingarde carries Mutiny, that is a brutal axe. Perfect for Warriors with the Executioner subclass.
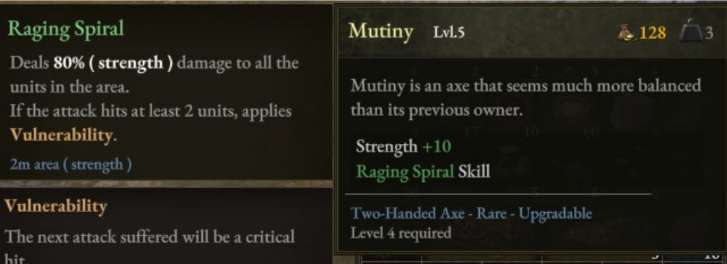
Unfortunately, I did not get an Alazarian Heater Shield from the Mace-bearer – regarded as being among the best shields in the game. However, my Pugalist reached level 5 – I never remember to change stance hence Adaptation was not too tempting – I took Personal Challenge. Note that units that kill several times can kill themselves in some situations by triggering attacks. I had a contract to kill some Deserters nearby, this time they were lead by a Corporal. They are heavily armoured, apply damage over time effects on them (bleeding, poison, burning), if you can apply Destabilisation to negate the guard, and when possible hit them in the back. If you are fighting in a forest look for rusty hatchets on the ground – they apply Destabilisation. After a visit to jail and some cooking and crafting in Stromkapp I felt that it was about time to move on to Vertruse, but ran into a ghost pack. I also remembered that there is another group of Alazarians in Tiltren, namely the purifiers that run around close to the Abandoned Tower. They sell plague remedies and the recipe for Sticky Oil, that oil makes a companion start with Protection – that may not sound great, but it is good in tombs and offers an alternative for players that want to deal with Mathias Lund but lack mercenaries with shields. To get a chance to fight the purifiers you need to pick up Torus from the Woodland Farm. It is rather appropriate that a Treatise on the Plague can be found at the farm, since Torus has been afflicted by it. However, the sneaky devs have hidden it somewhat, use Alt to highlight interactable object and look in the middle. If you recruit
Torus and talk to the purifiers they will demand that you hand him over – if you refuse you get to fight them. I do not like Torus, but I would like to get an Alazarian Heater Shield, hence I provoked the fight. I allowed the Alazarians to kill Torus the battle – he served as a nice distraction. Unfortunately, I did not get the shield. RNGesus did not hear my prayer.
I had now done almost everything in Tiltren, well, apart from dealing with the rat nests and exploring the tomb. I prefer saving them for later, hence I moved on to Vertruse. A Reno Waarheid stood outside the gatehouse and asked me to pay for his border pass – I did (you get the money back when you talk to him in Gosenburg later). Before entering Vertruse I used the resolutions Faking Innocence and Thirst for Knowledge. Better safe than sorry. I have been in situations in which guard patrols come from both directions when my party is crossing a bridge.
In Marheim use the same tactic as in Stromkapp – accept any cancel any contract that you have no intention of doing immediately, such as looting the bandit lair. The perk Negotiators from the Trade and Craftsmanship path allows you to negotiate the payment for contract – recommended. For me it was about time to start crafting ghost armour. Note that you can put armour layers in ghost armour for extra punch and protection. I noted that the innkeeper in Marheim now sells Lavender Syrup Biscuits and the recipe to make them – extra profession experience. That may actually come in handy, levelling up tinkerer in particular can take quite some time.
Once you are over the bridge close to Marheim you need to pick a direction, the road to the left leads to jail, the road forward to another town, and the road to the right leads to an arena. I like to visit jail first, talk to John Molen and Gerolt and accept their quests on the way. There is a cat on the loft above Gerolt, pet it. The sneaky devs have also left a chest that is hard to see to the right. At jail I like to get the recipe for Stocks – once fully upgraded it allows you to ensure that up to four prisoners are unable to escape. Make sure to also talk to Adele to get another quest. There is a large rock in a corner – use a miner to get rid of it and climb down through the hole. Do what you like with the escaped prisoner you find down there. The brutal captain Foureyes persuades her to talk and then fights her. If you leave the cave rather than climb up you can find a big hammer close by. Put a piton down so you can get down. A group of bandits with a skull are running around in the small forest close to the fields. They are connected to the bandit lair, hence you might as well take them out now. If you fight them on a field you will find yourself being on a new kind of map with chokepoints that can be utilized.
One of the other bandit groups is hiding in Sentinel Tower, close to jail. If you kill the bandits there you will find a chained prisoner at the tower – if you free him you get an Ornate Key – do not lose it because there are no spare Ornate Keys in this game. That key is meant to be used to unlock a chest that you will come across later. If you continue to follow the road and move into the forest you will come to the trackers’ camp. Make sure to talk to Istos there and accept his quest, the Vertruse Hunt. Continue through the forest past the Fellowship of Knowledge tower. Brownrock mine is nearby. Deal with the fools in the mine as you like. Leave the mine and inspect the body, follow the blood trail that appears. The blood will lead to a ghost pack – kill it to finish the Vertruse Hunt. Ghost packs only appear at night so you may have to chill in the forest for a while.
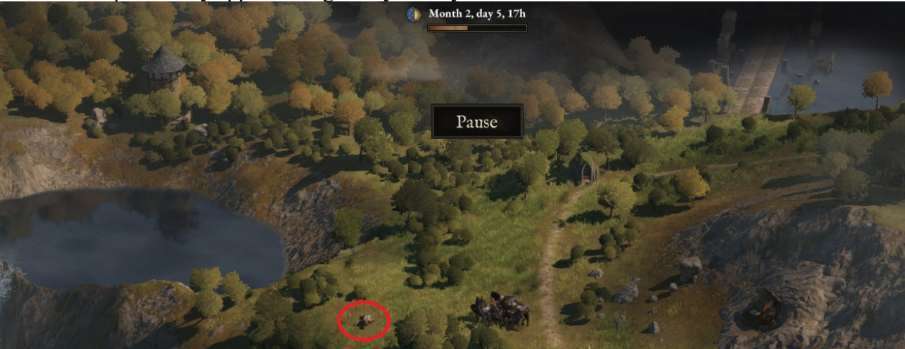
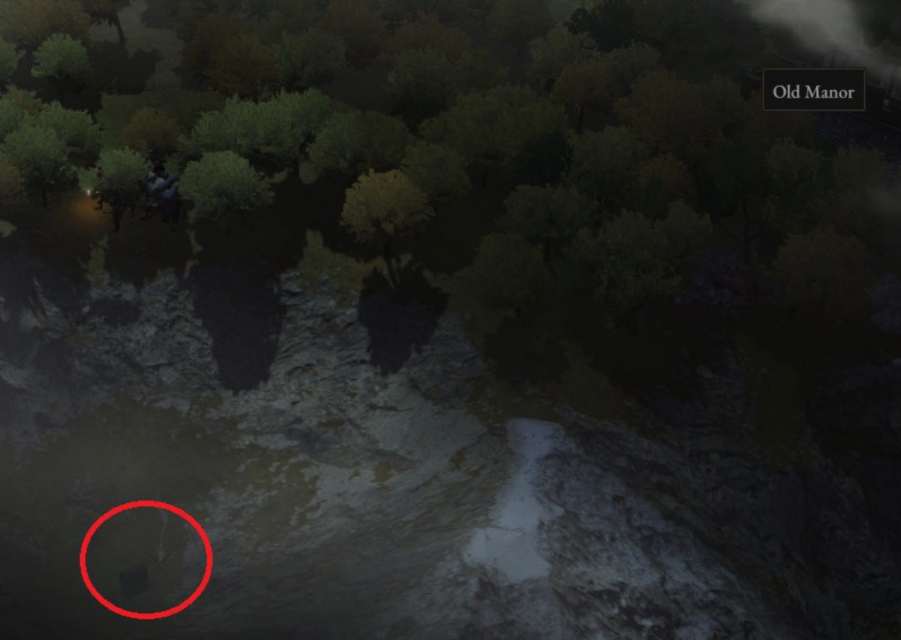
If you follow the road up you will come to an Old Manor, the sneaky devs have left a mastery book nearby – use a piton to get to it.
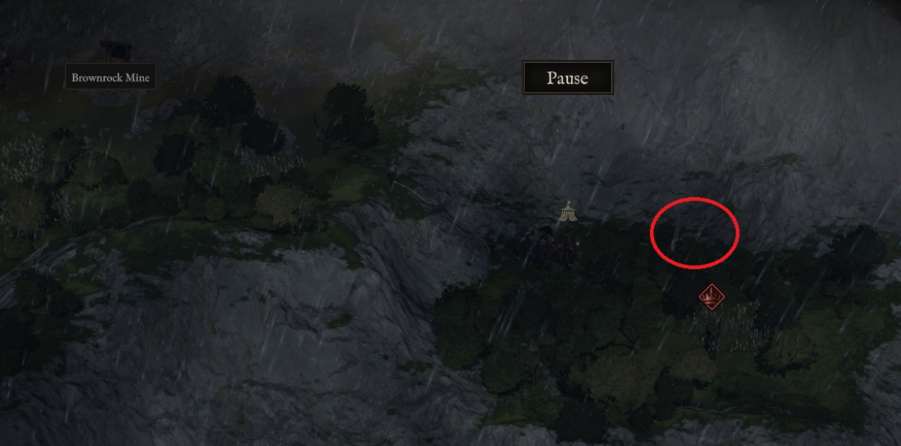
Another mastery book is hidden close to Brownrock Mine.
Leave the region boss alone until you have a contract to kill her.





Be the first to comment