
Beginners Guide to Economy Mechanics
This guide will explain economy mechanics in HOI4 (and elements in FUWG mod) more to help you understand what stats mean and how to (ab)use them.
First I will explain each main thing affecting your economy.
Research
Knowing the importance of each technology and how they will affect your economy is essential to good macro.
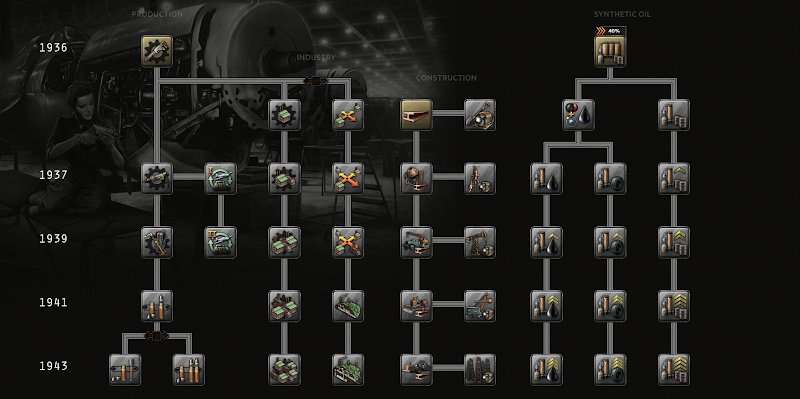
Generally I would say the order of which you want to attain industry technologies is construction highest priority, Tools second, and concentrated/dispersed third, and whenever you have a free slot, throw this into excavation technologies.
Refining technologies are only relevant to some countries, but can help your economy too. I will put this in a grey area as the importance of these technologies depends on your country and situation.
Now going from left to right, I will explain what each of these technologies actually do.
Tools
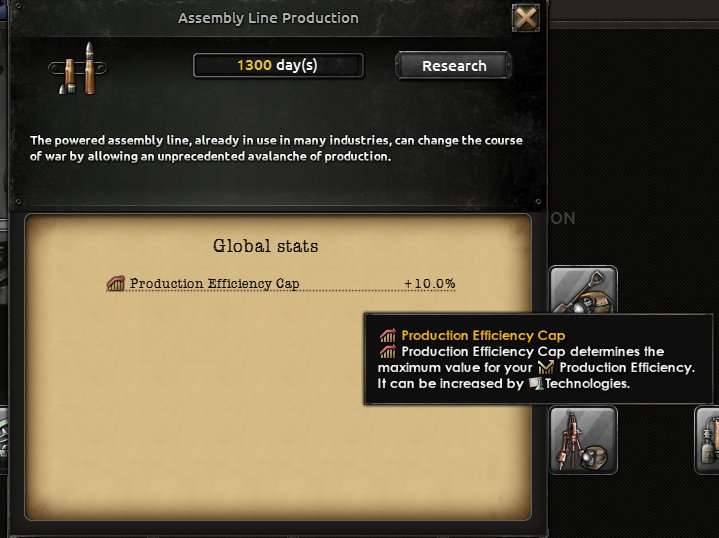
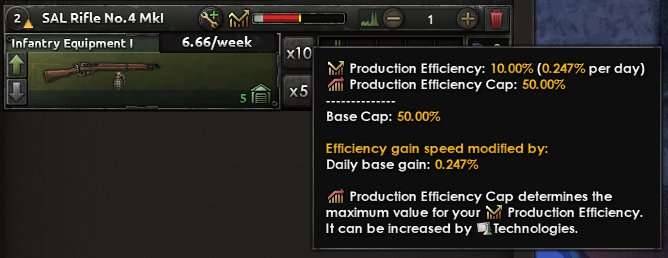
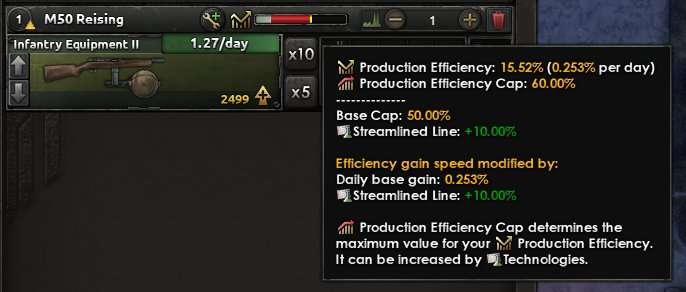
Hovering over the stat given, you can see the game explaining what that does, here is it visualised in an image below.
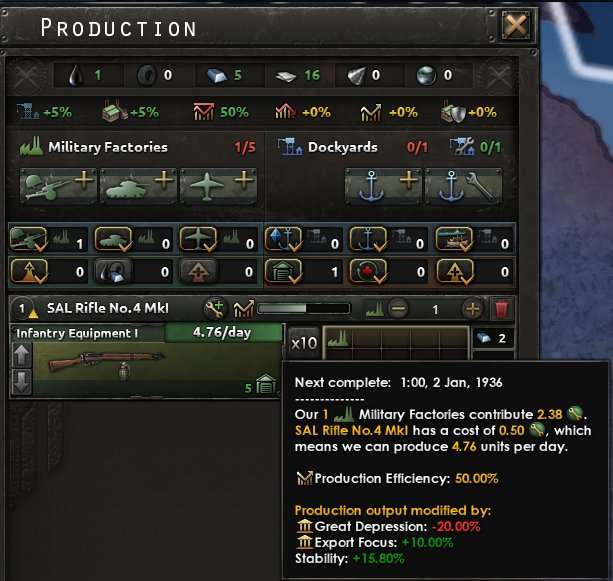
As shown above, our production efficiency is at 50%. There is also a breakdown of the maths contributing to the amount being produced a day. Ignore the production output modifiers, I’ll explain them later, but they are also contributing to the output figure.
Put simply, higher = better. However, when we add factories they will not be generating at 100% efficiency. Let’s take a look at how we will produce this gun with lower efficiency.
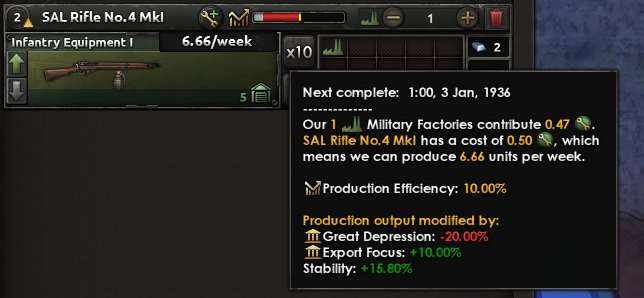
Here is the same gun with a brand new factory added to it. As you can see, our military factory operating at 10% is generating far less than the one operating at the 50%. This is because our production efficiency base starts at 10%, I’ll explain more about this when we focus on the production tab, let’s focus on the tools technology for now.
As shown with our new gun, our production efficiency gain is 0.247%, this means this percentage will be added each day toward the production efficiency cap, meaning over time we will produce more equipment.
As explained above this is why it is very important to keep up with your tools technology with high priority as higher cap early on means we gain efficiency and produce far more equipment as time goes on.
Now, at the bottom of the tools technology in the 1943 tech, we are given a choice;
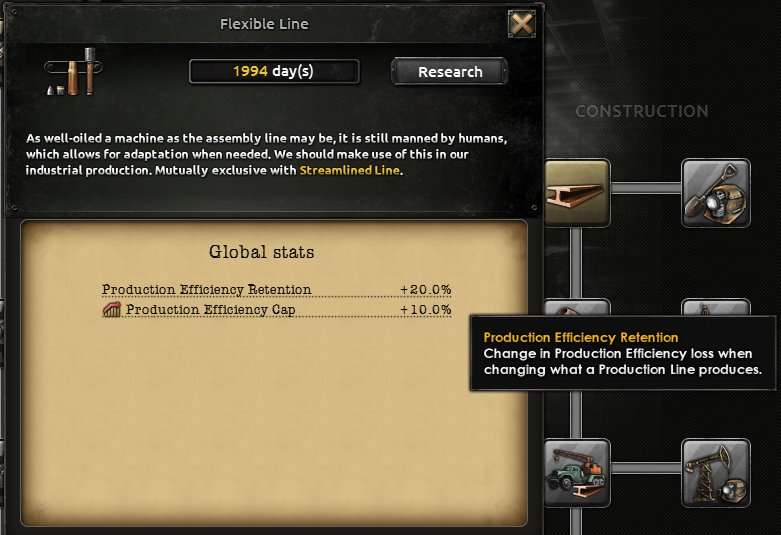
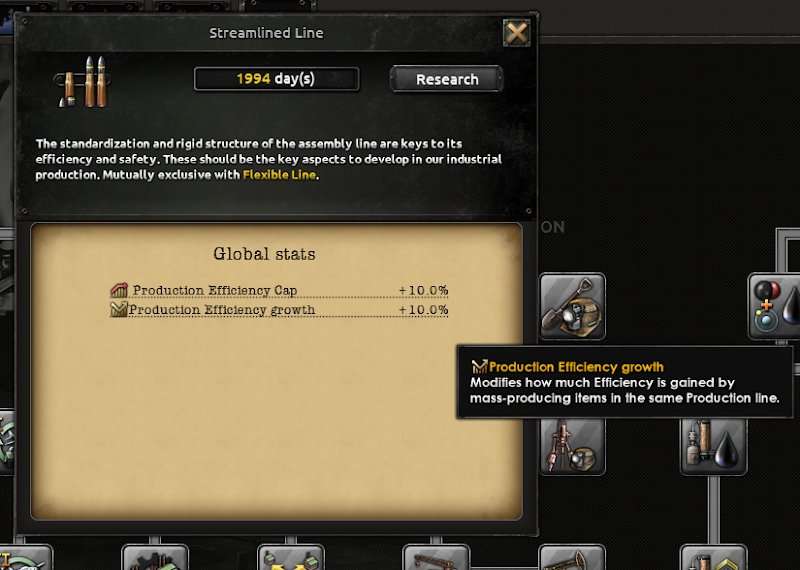
Streamlined line.
Both technologies will give us another 10% efficiency cap HOWEVER, we are choosing between 20% efficiency retention and 10% growth.
Production efficiency retention simply means as we switch technologies we lose efficiency and need to build that back up. Let’s take a look at that now, remember that gun with 50% efficiency? Here is what it looks like changed into a gun 2 with 0 production efficiency retention.
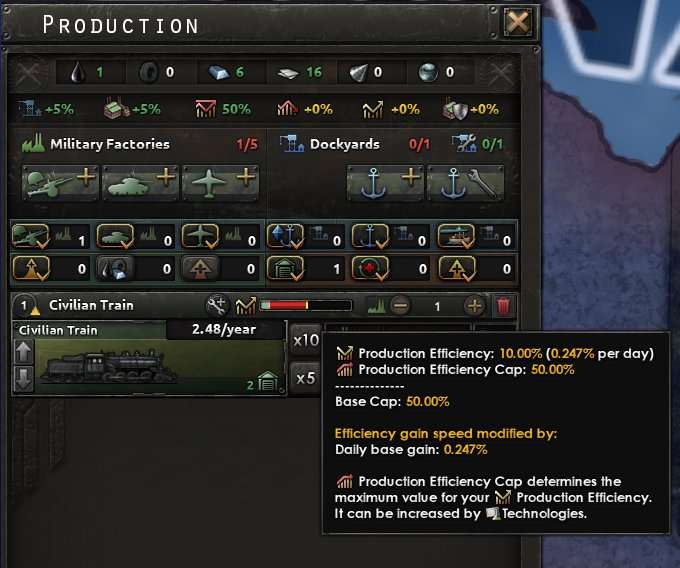
As you can see, back to the base stat, and this factory is now generating 2.48 a year and will take time to build up its efficiency. Retention will allow you to change production lines without losing so much of your efficiency, which means you will produce the technology you switch to faster off the bat.
Production efficiency growth will modify the speed of our base efficiency gain towards the efficiency cap, as shown here;
In my personal opinion, choosing a streamlined line is the far better choice here, I say this due to the year of the tech and by this stage of the game you’re unlikely to be shuffling production lines much. However you may find yourself in situations where you want the efficiency retention, so for those situations feel free to take a flexible line.
Now in tools there is also these two technologies;
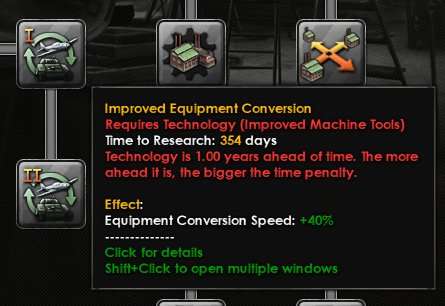
Both will give exactly as said, this is a modifier that speeds up the process of converting older equipment models to newer ones.
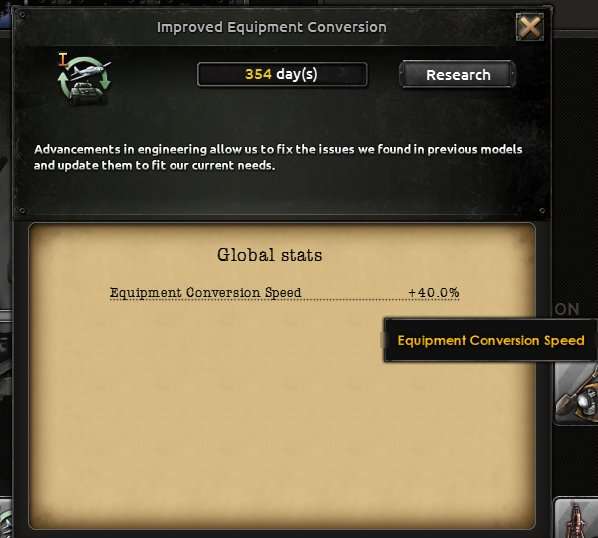
A lot of people mix this up as factory conversion speed, this is NOT the same stat.
Industry
With the industry techs we are given a choice between concentrated or dispersed. A lot of players debate over which is better, and honestly choosing which technology will depend on your build and situation.
Let’s start by looking at concentrated industry, and what its modifiers do.
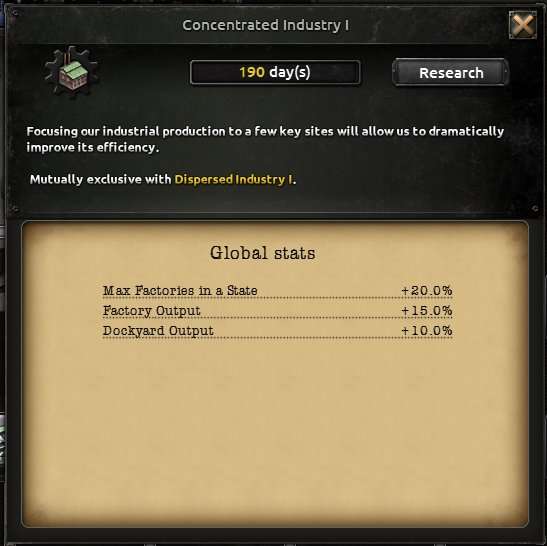
Max factories in a state is our first stat. Each country you pick will start with a set number of build slots, these are usually to reflect urbanisation of the area during the time period of the game.
As seen here, in canada I have 8 build slots in southern ontario.
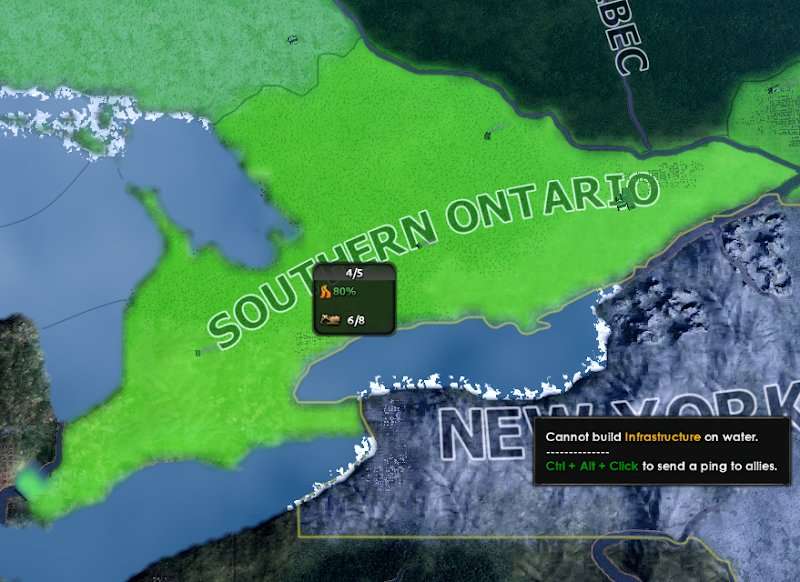
By attaining the +20% boost, I now have 9.
That is because 20% of our base stat is 1.6, so I have 9.6 build slots and the game will grant you 9.
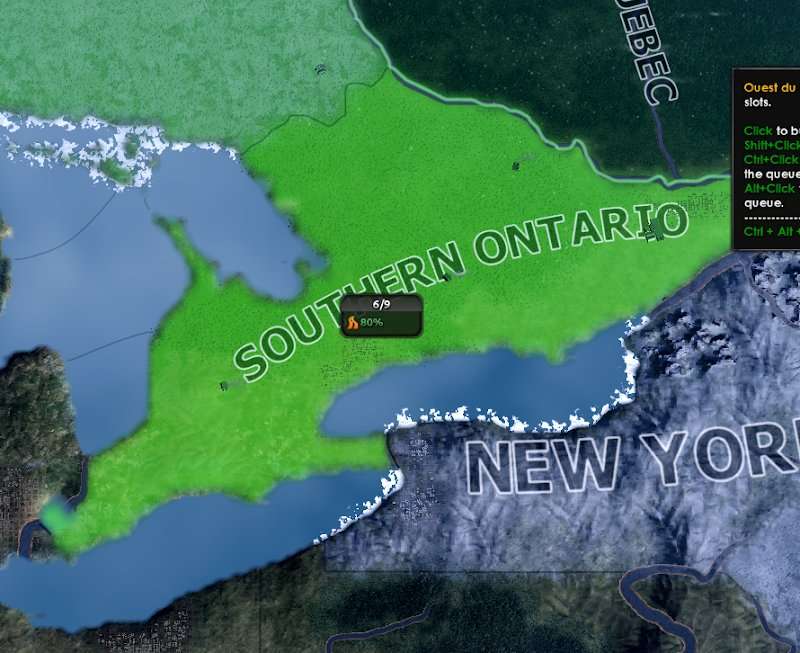
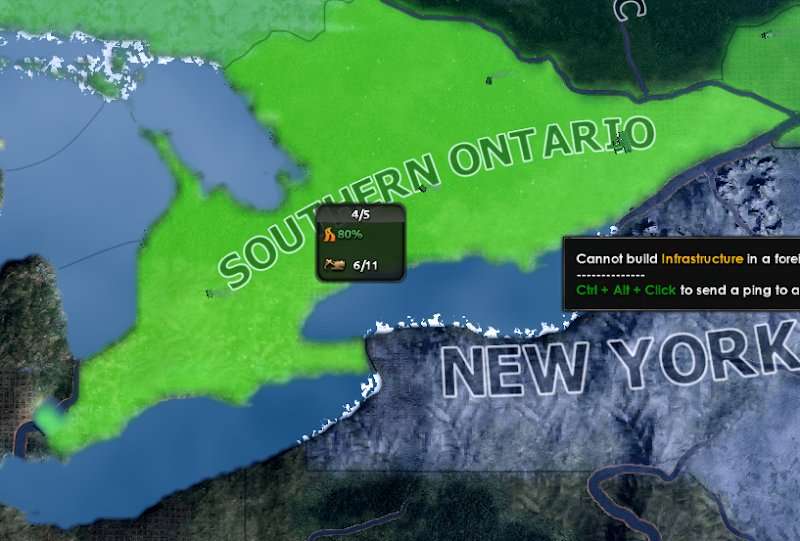
If I take the next tech and gain another 1.6 slots, I now have 11.2 as shown below.
I’ll go into more detail on the construction tab later in the guide don’t worry, but that explains the purpose of this stat.
The next stat we need to look at is factory output.
Unlike production efficiency cap, factory output is an instantly granted stat, and is relevant to where you are in the cap. Higher cap = more output yield.
Here is that same gun from earlier with some extra factory output added.

We’ve gone from producing 4.76 guns a day, to 6.11 without having to wait.
Not much to explain further on output tbh, it’s straightforward.
Dockyard output does the same as factory output with one major difference, it is not relative to any production efficiency cap, as this stat does not exist in naval production.
Now looking at dispersed industry, we have some extra things here, however less factory output.
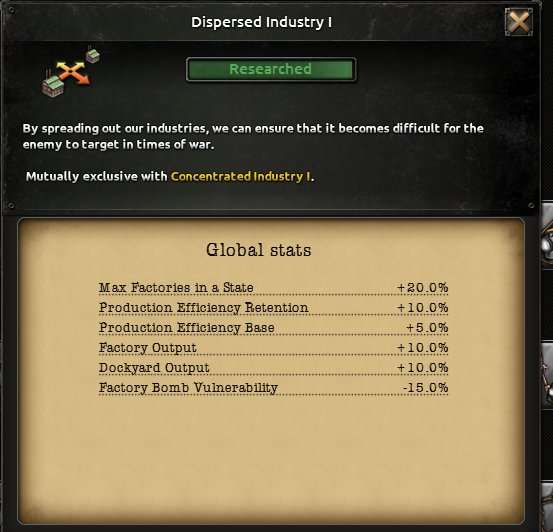
Now, we’ve already gone over each stat here except factory bomb vulnerability, this is pretty self explanatory. Factories wont be bombed so easily on dispersed, and each stat increases it’s resistance to bombing.
Now, you can see the main differences between these two technologies, dispersed is useful when switching lines frequently, and when you know you are going to be heavily bombed, while concentrated technologies have a grand total of 25% more output, but you will be punished when you switch your production lines, or cannot guarantee air superiority above your nation to defend against bombing.
Construction
Now let’s look at construction.
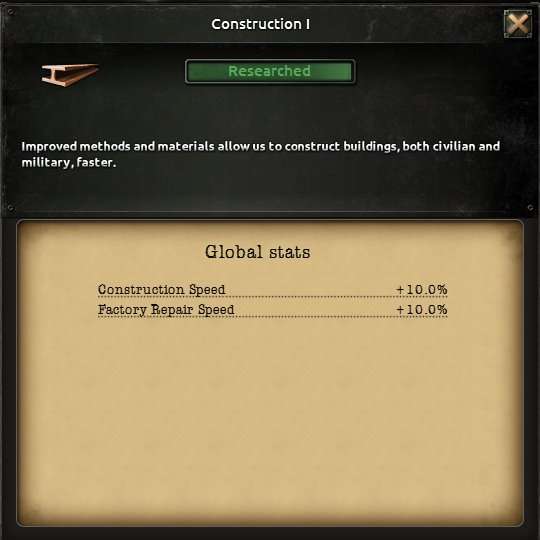
Construction is pretty straightforward.
Here I am building 1 civilian factory.
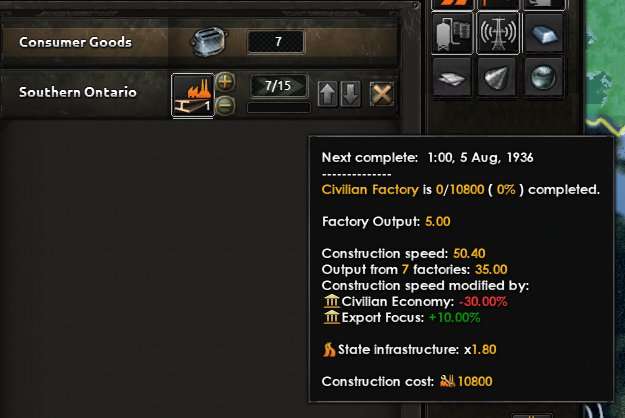
Each civilian factory has its own construction output, and each building has its own construction cost. The sum is shown above, increasing your construction speed modifies how efficient your civs will generate toward the construction cost of each building. I have 50.40 speed, so after 24 in-game hours, I will have generated 50.40 out of the required 10800 for my civilian factory.
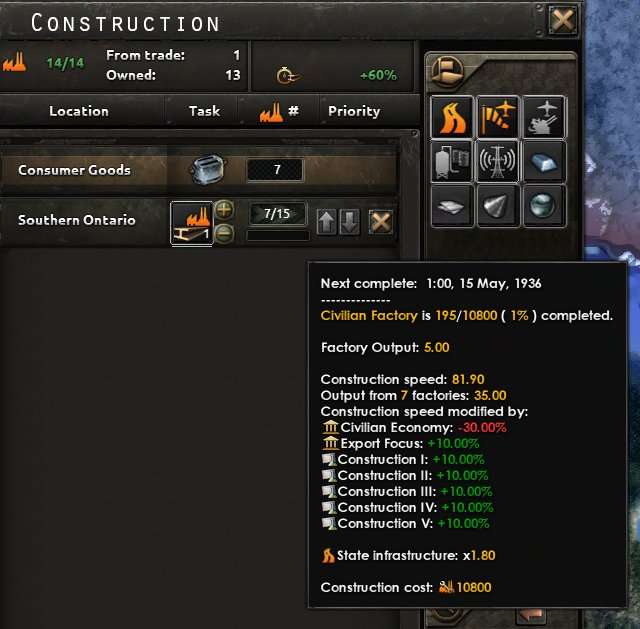
Again, there are other things shown in the sum above, but don’t worry we will get to that later, but shown here we can see a huge difference in how quickly we build by increasing this technology.
It’s very useful to rush construction tech quite early on, as this helps your countries’ economic growth tremendously, however, don’t overinvest here. As we’ve explained efficiency cap and output, we now understand that is we neglect tools and industry, we might actually build less efficiently or less equipment throughout the game as we’d have to build up infrastructure in new states, to accommodate for buildings, instead of new factories, we’d also not get as much tool tech meaning less cap and having to wait longer for newly constructed mils to gain that efficiency and high output. Be very careful not to fall into this noob trap.
Linked to each construction technology we have excavation.
In northern Ontario I have 32.
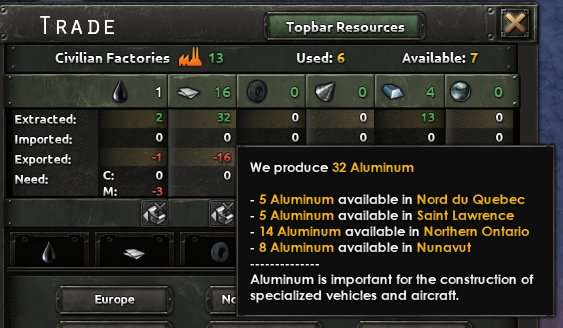
I can increase this yield by using excavation technologies.

We’ve now increased this using the excavation research by 24 aluminium. This can indirectly help our economy as we have to trade less civilian factories away for resources, meaning we get to put them to better use constructing buildings we need.
Synthetic Oil
The first technology we are given is Fuel storage.

Building fuel silos in states has the benefit of increasing your stockpile capacity, meaning you A: don’t waste daily generated fuel as you can keep storing some for longer and B: you can trade for less oil later on and just eat into your fuel stockpile for a while. This can indirectly benefit your economy as trading less factories away or for shorter periods of time is always a bonus.
Next we have synthetic oil experiments.
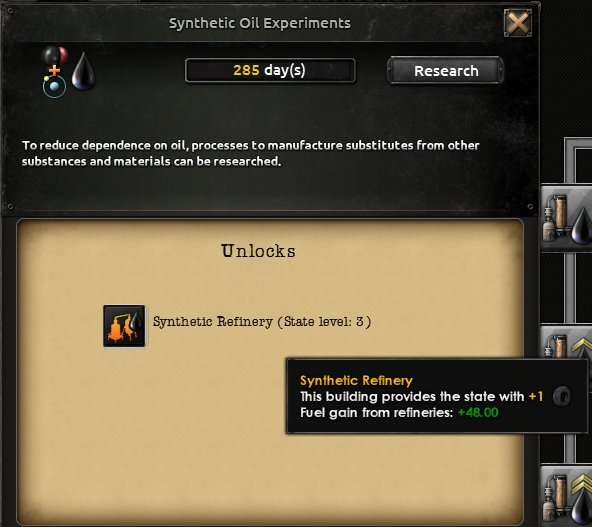
As shown here, refineries are essential for when rubber is in short supply, however building refineries not only adds rubber to a state but a set fuel gain stat also. Branched off this technology will increase both of these yields, which can indirectly boost your economy by trading for less rubber or fuel.
Lastly we have fuel refining.
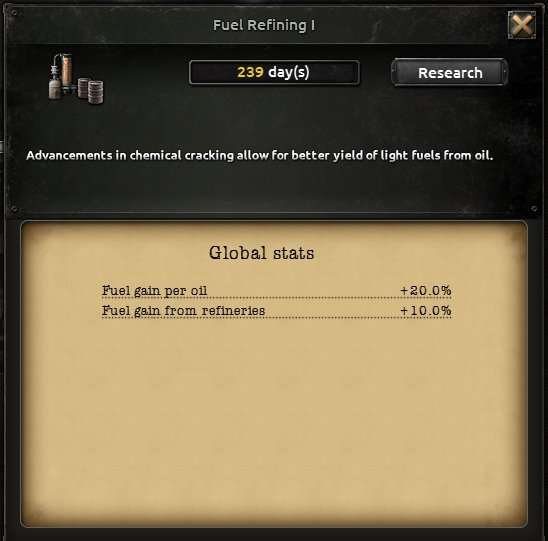
This increases fuel gain per oil and per refineries. As aforementioned this can be useful when generating your own fuel from refineries or oil as it means more fuel generation per oil/refinery, less trade required for fuel.
Notes
- Now before we leave the tech tree, I do want to note that each equipment has its own respective production cost. It is important to bear the production cost stat of each equipment in mind when producing it due to how factories work. Sometimes it’s not always worth producing the latest grade technology due to this, and we will look closer at production when we come to the production tab.
- Other things I do want to mention is about timing your research of different equipment effectively. Rushing equipment is very beneficial due to the efficiency cap being allowed to build up over time from a much earlier stage, and it’s nice to use national focus research buffs to assist with this.
Political
National Spirits
Now let’s look at the political tab. For the first thing I want to explain, Canada is a good example.
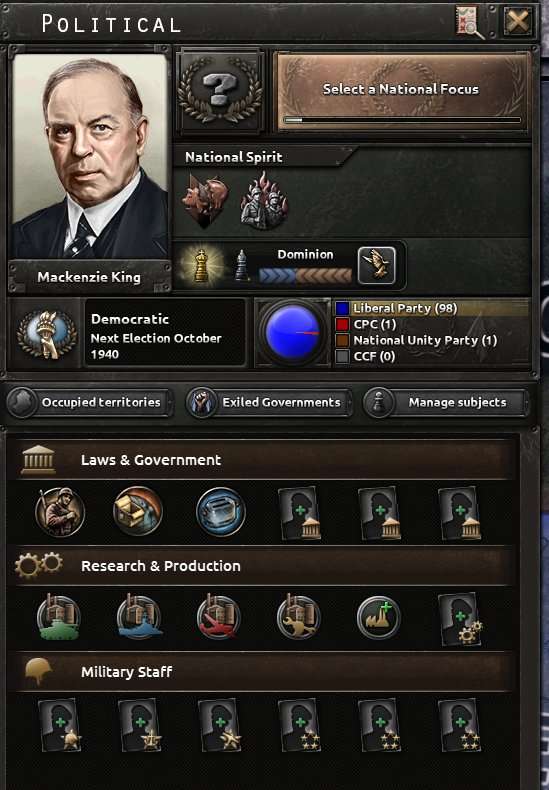
While national spirits can vary, most political tabs start off looking like this. The first thing I want to speak about is national spirits. Some countries can have negative modifiers from the beginning of the game to their industry and it’s important to nullify/eliminate these as soon as possible, or the total IC loss from neglecting this will become massive.
In our example country, Canada, we have the national spirit of the Great Depression which gives us a whopping 25% consumer goods, 20% less dockyard and factory output.
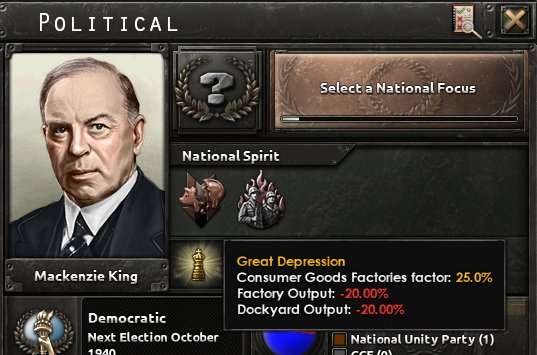
So, it is important to find out how to nullify/eliminate this modifier.
As shown here we have canada wheat board and war fueled economy which will nullify then remove this modifier respectively.
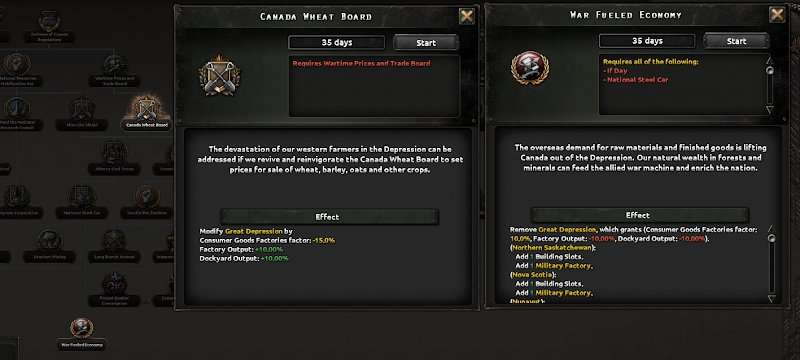
These focuses are locked behind war bonds and defence of canada regulations.
First off, defence of canada regulations, you need 20% world tension, then you can rush down to nullify this national spirit, bringing it down to 10% consumer goods and 10% output debuff for factories and dockyards.
Secondly, we have war bonds, which is locked by being at war.
So you now know to optimise your macro, you need to pay attention to world tension to decrease your debuff, then when war comes, you can rush down to war fueled economy to remove it entirely. If we ignore these important focuses longer than we need to, it will have a drastic effect on your economy, so make sure to always check countries’ starting national spirit buffs and debuffs before planning your build.
National Focuses
Essential to creating a build with good macro, is planning our build around our national focuses, as these will grant us research buffs, free factories, infrastructure and more. Here I will be using the FUWG generic focus tree as an example, but the vast majority of focus trees tend to be broken up into sections. Falling into the following categories.
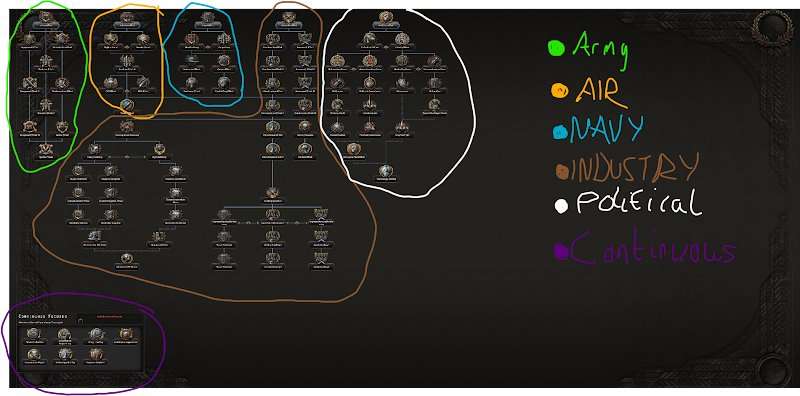
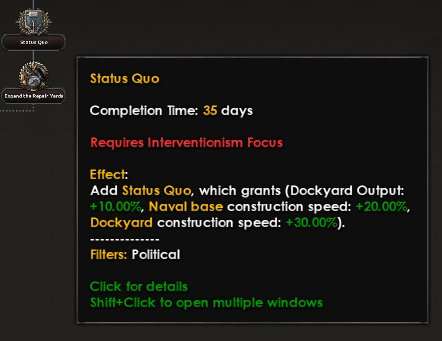
It’s important to read through all your focuses when planning your build and macro, as not all buffs will be located in their respective sections. An example in this tree is the focus status quo, giving industrial buffs in the political tree, as shown below.
So in the focus tree, the best thing to do is start off by attaining some political power to sink into good economic stuff later. For example, my first two picks tend to be related to PP gain, as the benefits are massive.


Be the first to comment