
Country Management
Ву Serenade.
What to do when you’re at peace!
In multiplayer, it is necessary to build the strongest country in order to prepare it for conflict with other players; efficient resource use is the foundation of a competent MP player. There are two main economic resources in EU4: monarch points and ducats.
Between the two, monarch points are the more valuable resource. When given the option, the player should trade ducats for monarch points in almost every circumstance. In this section, I will break down the components of a strong country, and give tips on how to maximise each one.
Monarch Point Economy
The ability to generate and use monarch points (or mana for short) is a key aspect of EU4. Having good mana generation means you get technology earlier, fill up ideas faster, expand faster than other players, and can develop more often. All of these are important advantages over others. We will first discuss how to get as much mana as possible and then talk about how to spend them effectively.
Monarch Point Generation
Ruler and national focus
The first source of mana generation is the ruler. If you are a monarchy, the average ruler is 3/3/3, but with the Rights of Man patch it is possible to disinherit heirs. This allows you to significantly improve the skill of future rulers. I recommend disinheriting any heir with that generates less than 8 mana per month, with it being understood that military mana is the most valuable type. As prestige is required to disinherit often, farming prestige is occasionally necessary.
If you are a republic, the re-election mechanic is crucial to get exceptional rulers as soon as possible. Therefore republican tradition can be considered to be stored mana that you must extract. I usually recommend always re-electing any ruler who starts below the age of 40 until they die, but it is possible to always re-elect and still float significant amounts of republican tradition. This is because of an event which can fire if your current republican tradition is below 40: it offers a choice of getting 20 republican tradition for 1 stability (the MTTH is lower for Ambrosian Republic) which is an excellent tradeoff.
National focus helps players balance out their mana generation. At the game start, military focus is mandatory due to the early game technologies being so impactful. In fact for most of the game you should be on military focus due to military power being the best one to generate in large quantities. Admin focus is good when expanding through large swaths of land or filling out admin ideas. Diplo focus is never recommended for the average country, but it can be useful if you are filling out a diplo idea group, annexing multiple vassals at once or doing extensive culture conversion.
Advisors
After the ruler, advisors are the key source of mana generation. Early game the +1 mil advisor and +1 admin advisor are strongly recommended, almost regardless of income. Upgrading them as your economy grows is essential to keep up your mana generation.
Some advisors are discounted and cost only half their usual price. These generally come from events and estates, and are exceptionally good. Half-price advisors should be spammed as far as possible, and are quite cheap to promote to +4 or +5. When your income is higher than 25, you can start using a regular +2 mil advisor and the half priced +3 admin advisor from clergy or burghers, and when your income is higher than 50 you can start using +3 mil advisors. Since dip mana is usually the least valuable to generate, dip advisors are usually kept to +1 until you can afford the more expensive ones.
However once you can afford more expensive advisors, +3 advisors across the board are strongly recommended. This is because each advisor type have the chance to trigger a special event once per campaign; this gives you a choice of either +1 stability or +50 prestige, and a bonus that is unique to each advisor lasting 6 years. The stability and prestige are both useful, but the unique bonus can be extremely powerful. 2 noteworthy ones are the Grand Captain (Land maintenance) whose event gives 20% morale and the Commandant (Discipline) whose event gives 10% discipline. For this reason you want to avoid using a +3 Commandant when you do not need his event to prevent wasting it at an inopportune moment.
In addition to mana generation, advisors also give useful bonuses to your country. You want to pick advisors whose bonuses help you. In particular, when at war you want to have either the Army Reformer who gives 10% morale, or the Commandant who gives 5% discipline. Other useful advisors to note are the Inquisitor for missionary strength to help with conversions, Artist for yearly prestige, Natural Scientist for production efficiency, Diplomat for bleeding aggressive expansion early, Spymaster for spy network construction and the Trader for trade efficiency.
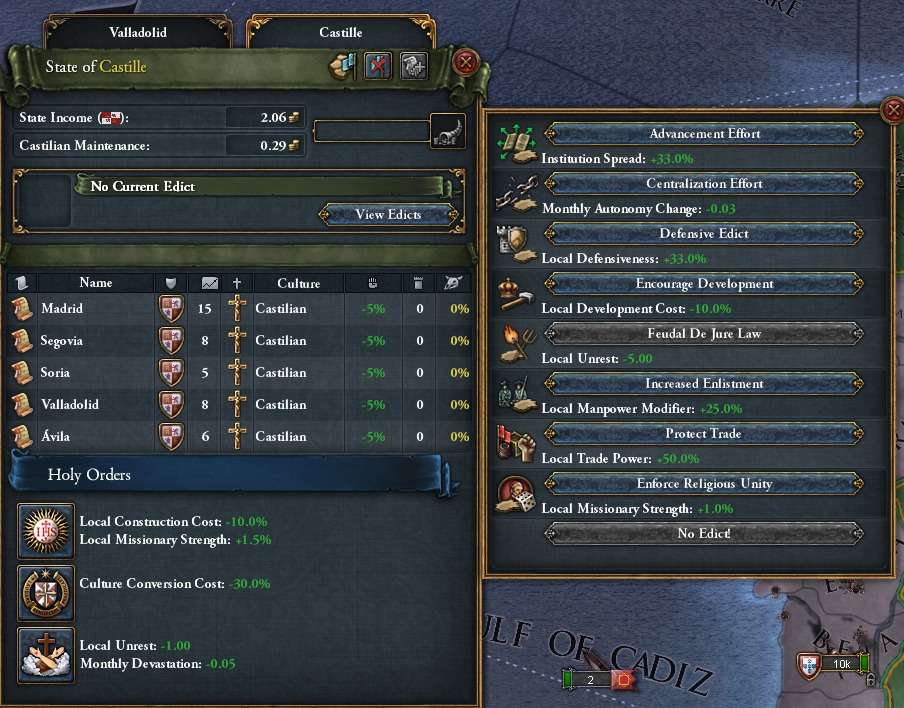
Estates
These have the potential to greatly boost your strength. The best way to think of estates are freebies that you need to remember to collect. For starters, they give passive bonuses when above 40 loyalty and these max out in strength at 60 influence. Thus you want all your loyal estates to be above this threshold.
Every 20 years, you can demand admin mana from the clergy, diplo mana from the burghers and mil mana from the nobility. The amount of mana generated depends on the estate’s influence. It is recommended to set influence to more than 75% in order to gain 150 mana per category. However, when at least 2 events reduce estate influence, the player should settle for 100 mana. The impact of the estate interaction on the estate’s loyalty can be mitigated by another estate interaction that boosts loyalty and conveniently shares an identical cooldown.
Republics may want to be careful about Seek Support from Clergy as it costs 3 RT. They might want to donate to clergy instead. The discounted advisors should also be obtained as often as you can, and you should use them as much as possible. Since 1.27, these advisors are only 25% cheaper if the estate has 60% influence and 50% cheaper if the estate has 80% influence. Plan around your interactions to get the discounted advisors. These interactions significantly boost your mana generation.
Several other useful interactions to note are burghers giving free money every 10 years , nobility giving a 40 tradition general and manpower. If you are a colonizer, burghers can also increase yearly settler growth.
Estates also give a local bonus to provinces that are given to them; the most noteworthy ones are burghers giving +50% local trade power and nobility giving +20% local manpower. For these reasons, burghers should be given centers of trade as far as possible, and nobility should be given lands with high base manpower.
There are also some drawbacks with using estates. Provinces given to estates have 25% autonomy floor instead of 0%, but the bonuses from the estates are usually enough to compensate. This means you do not want to give provinces with high value trade goods to the clergy or the nobility. Estates also ignore autonomy floor for specific things depending on their type, so giving high autonomy provinces to estates is also a good way to improve the productivity of the land.
Estates can trigger a disaster if their influence goes to 100%. Although players can greed out 200 mana, it is not recommended to get to 100 influence as that estate will be disloyal for a large amount of time. If you do have a disaster ticking, remember to remove provinces from the offending estate in time to avoid the disaster. These ticking disasters may be ignored if events which boost estate influence lose their effects before the disaster ticks to 100%.
With these in mind, here’s my recommendation for estate management:
- Clergy go on high base tax provinces with low valued trade goods (but not grain), with a secondary preference for farmlands, grasslands or drylands.
- Burghers go on all centers of trade and estuaries, with a secondary preference for high-value trade goods.
- Nobility go on grain, with a secondary preference for high manpower provinces on hills or woods with low value trade goods.
Grain provinces provide an exception to the above rules as they ought to exclusively be assigned to the nobility for their local bonus of 0.5 land force limit. Since the nobility estate ignores local autonomy for manpower and force limit but other estates do not, giving grain to clergy or burghers (except if it is a center of trade) is inefficient.
Other sources of mana generation
The first to note is power projection. Keeping power projection over 50 by humiliating rivals, embargoes, insults and privateers will help with mana generation greatly as this grants +1 to each mana.
Secondly, showing strength on your rivals also gives 100 of each mana. It’s recommended to do this to AI in the early game to help with mana generation and later on you can make deals with other players to buy show strengths for money.
Great power influence is the last way to get extra mana. It gets expensive if you are too big, but in the early game if you are a minor with income less than 30 it can be worthwhile to pay a great power to influence you just to get more mana.
Monarch Point Usage
Technology and ideas
Military technology is the most important technology that everyone must keep ahead on, followed by military ideas. These allow you to strengthen your army, which is of the essence in multiplayer. This is part of the reason why mil power generation is so important. It is strongly recommended to only spend military mana when approaching the mana cap so to keep the potential of taking a military technology well in advance. Military technologies are indeed often taken at close to 999 cost in MP because of the timing window they provide.
Admin technology unlocks new idea groups, which are crucial for improving your country. The first 3 idea groups also unlock your nation ideas thus should be prioritized. Filling up administrative idea groups over taking admin tech is strongly recommended as ideas provide a tech discount and the technology will be further discounted by neighbor bonuses. In fact, MP players who are not concerned about production efficiency due to ahead of time in admin tech should only be cautious about hitting the administrative technologies that unlock idea groups on time.
Diplo technology are unfortunately not the most useful, so generally have the lowest priority except if you are a trading or naval country, and benefit greatly from the trade efficiency and new ships respectively. Thus it is recommended for countries who do not care about trade efficiency or ship to spend most of their diplo mana on development and culture conversion and only consider taking the technology when you are getting corruption from unbalanced research.
Idea group selection
It cannot be stressed enough that idea groups must be chosen with a set of policies in mind. Unless you are focusing on trade or naval bonuses, you need to prioritize military ideas groups which improve your army. Admin and diplo idea groups should be chosen with military focused policies in mind to complement this idea. Note that these are likely to change in the next patch due to the policies rework.
All out army: The default go-to build for most land powers without any niche strategies. There are 2 main variants, Quality or Defensive first.
- Quality, Economic, Offensive, Innovative, Quantity, Diplomatic, Defensive, Administrative
- Defensive, Economic, Quality, Innovative, Offensive, Diplomatic, Quantity, Administrative
This build maximizes your army quality, containing the 4 best military groups as well as the best military policies in the game now that you can only have 3 in the military category:
- Economic – Quality (+5% discipline)
- Innovative – Quality (+20% infantry combat ability)
- Diplomatic – Offensive (+50% available mercenaries)
- Economic – Quantity (+10% land force limit and dev cost)
Variations in build order
Diplomatic is a viable option 4th in place of Innovative. This gives you a stronger army immediately, but is worse for your economy and mana efficiency. Religious is not recommended anymore as there are no policy slots for it.
Plutocratic is a viable option in place of Quantity ideas for countries which are eligible for it. Quantity is still better in majority of cases due to the sheer force limit and manpower it provides as well as development cost, but Plutocratic gives relatively more value now that Quantity no longer gives extra mercs as an idea.
Administrative is possible 6th instead of Diplomatic if you really need to go to war immediately, cannot wait to finish Diplomatic for the policy and greatly appreciate the interest reduction.
There are other more situational builds, which are described briefly below. You should only pick one of these builds if you are very clear on what strategy you are pursuing; otherwise 90% of the time they make your country worse than the “default” build.
Exploration-based builds: Exploration in itself is an excellent idea group for countries which stand to gain from colonization, but it comes with the opportunity cost of not having a mil group or an admin group with useful mil policies. This means that Exploration-based builds will always have poor army quality in the early-mid game until they can scrap it for a better idea group later on. Goes into either a full naval/trade build with Maritime and Trade as key ideas groups, or re-focuses on military quality late game by refunding Exploration. Recommended only for England, Castile, Portugal, Netherlands and other colonizers. Not recommended for France and Burgundy who should pursue army based builds.
Quantity-based builds: Quantity is the best idea group for expansion into AI hands down, but I feel that it falls short when fighting players for a variety of reasons that I will not discuss here. Thus I generally don’t recommend it when playing in a very competitive region such as Europe. Quantity is stronger with scale, thus can be useful on countries that already have good quality and scale, and are usually expanding into weaker players. Asian/African countries are prime candidates for Quantity-based builds. Often this build goes into Diplomatic or Administrative for max merc spam and efficient blobbing into AIs.
Trade-based builds: Focused on money-making, this build often uses Administrative, Quantity, Quality idea groups to use their extremely powerful policies and rack up trade efficiency. It can make 4 digit income as early as the 1600s, but will have a mediocre army as a result. Usually ends up being max army in the late game regardless, though it can also diversify into a naval oriented build with Maritime ideas. This build utilizes on the benefits of trade steering and collecting with higher trade efficiency to make lucrative deals with other players, leading to profits to both sides.
Development
In an MP setting, expansion is quite limited so development is a very important way to get stronger. There are 2 main reasons why development is extremely powerful compared to expansion. The first is that it unlocks new building slots, and lets you make the most out of your provinces. The second is that developing existing provinces do not use up state slots, and produce right culture, right religion provinces with low autonomy.
In general, you want to develop often with excess mana, but try to be efficient. Universities and Economic ideas are very useful. Other good things to do are the state edict, prosperity, Quantity-Economic policy, loyal Burghers and Golden Era. This is
For now, I would recommend developing provinces to multiples of 10 to unlock building slots, but not more than 30. Priority should be given to getting the woods and hill provinces to 10 development. Afterwards, development should be prioritised where it is cheaper (i.e. farmlands and grasslands), and mil dev > dip dev > adm dev. This is another reason why mil focus is so good.
Ducat Economy
In this section we focus on earning and appropriately spending the game’s universal currency: ducats. In multiplayer having tons of money is a huge asset, as it can allow you to fund mercenaries in wars to supplement your manpower and buy people off diplomatically. Ideally you want to have maintenance down most of the time, and loot money off the AI early game often; money you invest in buildings make your country massively stronger, and can often snowball out of control.
Autonomy is multiplicative with all sources of income, so letting autonomy go down early game is crucial. The Economic idea group helps with this, but otherwise being at peace to let autonomy tick down is a good idea if your autonomy is too high across the board. I recommend raising autonomy in the early game only if it will actually prevent rebels from popping altogether. Lowering autonomy is strongly recommended in the Age of Absolutism as it increases your absolutism, and I also do it in high-value provinces that I want to get the most out of early game.
Loans are an important part of the economy that will not be discussed here; but players should not be afraid of taking loans to fight wars where they can gain land or to pick event choices which give mana.
Sources of Income
There are 6 main sources of income in the game: taxation, production, trade, gold, tariffs and diplomacy. We discuss each of these in turn and what you can do to maximize them.
Taxation
The first source of income is Taxation. This is mostly good early in the game before production and trade starts to take over later. It depends on your provinces’ adm development and some modifiers. As all modifiers for taxation are additive with each other, this is a weak source of income in the late game.
The Temple and its upgrade, the Cathedral improve local tax income. I recommend Temples on all farmlands, grasslands and drylands that you don’t need forts on, and on provinces where you get 0.2 a month or more. Cathedrals, however, are much worse and almost never pay for themselves due to how late they are unlocked. I still build them if I need the conversion speed or on provinces with 8+ base tax.
The only other way to improve your tax income is with tax modifiers. These are quite common, but due to the additive nature they don’t do a lot. Early game, the Treasurer advisor and Church Taxes from the Papacy interaction is very helpful, and the Clergy estate always provides a nice boost to income. Some ideas also give tax efficiency, and having high Devotion as a theocracy or Legalism as a muslim country also helps.
Production
This source of income is extremely strong later on in the game and all players should try to maximize this as far as they can. Workshops/counting houses and manufactories improve your production income, and ideally you have them in all your provinces. Sometimes you don’t have enough building slots, then you should prioritize to only have workshops and manufactories in provinces on provinces with good trade goods (trade value of 3 of more is a nice benchmark).
The crucial thing about production is that it’s improved by goods produced modifiers, and a very important one is prosperity, therefore investing an early 100 admin into stability can help get you started. Production efficiency is also multiplicative with goods produced, and this makes production income huge in the late game. Common sources of production efficiency are ideas, Natural Scientist advisor and ahead of time in admin tech. This is usually 30-50% of a typical country’s late game economy.
In the late game, Coal is an excellent resource to control. Each coal province allows you to build a Furnace that increases global goods produced by 5% (and the good itself has a trade value of 10) while the trading-in bonus increases goods produced by 10%.
Trade
One may think of trade as “collecting” the money that countries produce, thus goods produced modifier increases trade value (which is why this is one of the strongest economy modifiers in the game). The share of money you can collect or steer is based on your fraction of Trade Power. The Marketplace and its upgrades are good to have in all centers of trades in contested trade nodes. Controlling more trade power can let you secure the value of your production, but also potentially allow you to reap the fruits of other players’ production.
In general you want to control a good trade node and steer toward it. The best nodes are coastal nodes with lots of influx and few outgoing nodes. Either kill competitors or make a deal with them to split the profits. Then you want to expand upstream of your node to funnel more trade value into it.
There are 2 very important mechanics related to trade. The first is trade steering. Whenever a merchant transfers trade downstream, the trade value gains a base 5% boost (increased by trade steering modifiers). In a long chain of nodes that you control, trade steering can increase trade values to ludicrous amounts. The other mechanic is trade efficiency, which amplifies the value of trade that you collect. Common sources of trade efficiency are ideas and policies (the Trade idea group is extremely powerful for this), Trader advisor, Burghers estate, collecting with a merchant in your node and ahead of time in diplo tech.
As goods produced, trade steering and trade efficiency are all multiplicative with each other, trade is possibly the most overpowered sources of income and usually make up 20-90% of countries’ incomes depending on how specialized they are for trade.
Gold
This trade good is mined from gold provinces, and instead of generating production and trade value like any other trade good, it instead converts to a flat rate of 40 ducats a year per goods produced, or 8 ducats a year per point of diplo dev before modifiers. The crucial thing to note that it is per goods produced, so gold is affected by goods produced modifiers, especially prosperity. This makes gold extremely powerful early if you can protect the gold mine, and it’s the best trade good in terms of raw money generation.
There are 2 drawbacks with gold, however. The first is inflation which increases depending on the share of gold in your income; early game this can be a problem, but once you have Economic ideas and hire the Master of Mint advisor, it can be mitigated. In the late game, your economy is always production and trade focused and hence the inflation generated by gold is less significant. The second issue is gold mine depletion. Every year there is a chance to “deplete”, halving the production dev. This chance depends on the current production dev. If you ever get your hands on a gold mine, you should always dump diplo points into developing it; it always pays for itself. Due to the previous truncation bug being fixed, the current recommended gold mine dev is now 8 rather than the previous 12.
Tariffs
Colonial nations pay a tariff to their overlord that is determined by the tariff rate. However, colonies only lose half the amount whereas the overlord gets the full amount, and there is no limit on the tariff rate (it can go above 100%…). So obviously this has the potential for some exploitative gameplay. With player controlled colonies, tariffs is the most broken income source, with large colonies like USA easily paying 800+ ducats in tariffs in the late game. The way this is set up is that the overlord continuously pays off the CN’s debt and raises the tariff rate to keep the liberty desire down while milking more and more money for free.
Tariffs paid by the colony depends on the income of the colony; thus it is a good idea to invest in manufactories in the colony to improve production and trade income in order to milk the tariffs to the maximum. Spending some excess points to develop production in colonies cheaply is also a nice idea because it increases their income and reduces their liberty desire. Another thing is that tariff efficiency multiplicatively increases the amount of tariffs you can get. There are not many sources of tariff efficiency, but they mostly come from ideas and the Colonial Governor advisor. Colonial focused nations like Great Britain, Spain and Portugal can make fairly obscene amounts of money from tariffs, especially from player controlled colonies.
Diplomacy
This last source of income is quite unorthodox, and is not technically a source of income in the game so it requires players to be creative. The only limit to diplomatic income is your diplomatic skills. Common ways to get more income from diplomacy are protection from enemies, trade agreements and termination of hostilities.
If you’re playing a country with a powerful army, I always recommend picking up a moneymaker as an “ally” to supplement your income. If you have control of the seas, threatening to privateer and/or steer trade from others can also earn you more income through deals. Finally, mutually beneficial agreements can include money as part of the clauses.
Buildings and Slot Management
The main reason to build a strong country with a good income is so that you can expand your infrastructure to improve your army and navy. For majority of nations where army is your primary concern, I recommend the Regimental Camp and Barracks buildings in every single province where slots are available.
Naval buildings are only recommended if they are essential for your country. Courthouse buildings are never recommended. Universities are recommended as far as income allows, because this building doesn’t cost a slot and gives a bonus to development costs.
Forts are imperative to have on defensive terrain to protect your country. Sometimes you have to give up a Workshop or Barracks for these.
Diplomacy
How to use other people to achieve your own goals
Diplomacy with AI is awfully boring – they follow a fixed set of behaviours, making them very predictable. Furthermore, they do not have any goals for themselves – thus all AI are merely stepping stones to your own ambitions. In multiplayer, it is important to recognize that every player has their own ambitions, which means that you cannot take them for granted. Interacting with other players is the most fun part of multiplayer, and doing it correctly is critical for your survival.
Pre-Game Activities
Diplomacy starts before the campaign even begins; once nation claims are confirmed you should ideally get right to work. This section sets out 2 crucial things you should before conducting any diplomacy.
Goals and expectations
Before the start of any campaign, I recommend having an idea of what you want to achieve during the campaign. It should not be something too specific, but something like “I want to have a strong army” or “I want to dominate trade” will do nicely. The reason for this is so that you know what you are working towards; more on this later.
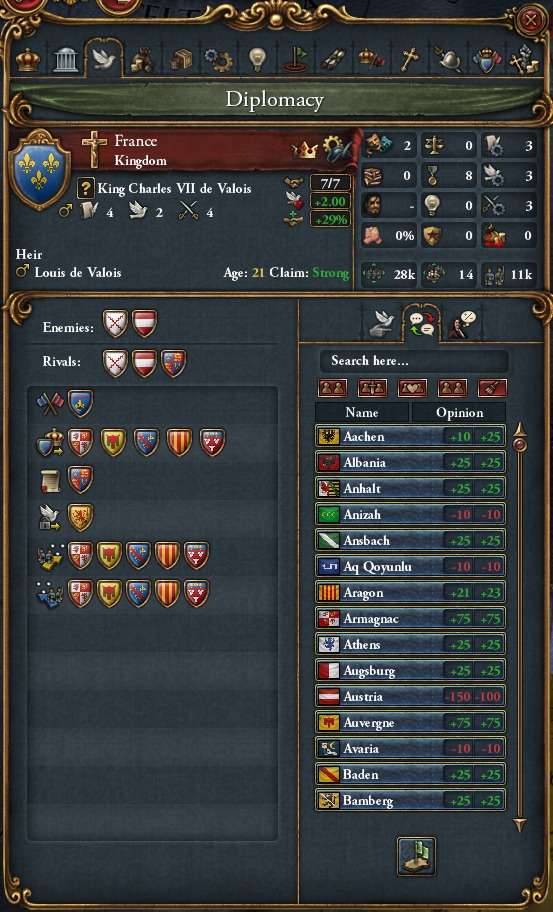
Socializing
The first step in any multiplayer group is socializing. You should find out who are your immediate neighbours and anyone who you think will be relevant to your situation and add them on steam. Chat with them and exchange your views, even if you expect them to be your enemy. Find out what their plans for the game are, which will allow you to determine their interests. This section is fundamental to good diplomacy; only by understanding the ambitions of others will you be able to offer deals which others will accept. There is no better way to do so than by socializing.
Ideally you want to present yourself as a friendly person, since it makes others more likely to tell you about their plans and be less guarded or suspicious towards anything you offer. Appearing to be hostile or overly ambitious will make others very anxious. Feel free to let others know what your general goals will be; although it makes others read you more easily, it also allows others to offer deals which are beneficial to you because they know what you want. It also lets you find friends who have common enemies.
Important Concepts
This section outlines diplomatic concepts that will form the foundation for diplomatic theory. Creative usage of these ideas is required for good diplomacy!
Interest and ambitions
Hopefully shortly after nation claims are confirmed, you will have a good idea of your own goal, as well the goals of nearby players by socializing. The first thing to do is to map out everyone’s interests. Interests are the most basic steps on the way to achieve goals. Mostly commonly, these come in the form of land. For instance, as Portugal, I want to make a lot of money, then naturally the New World and trade routes from Asia will be of interest to me; any land in Eastern Europe will not. Most players conduct diplomacy based on interests; thus understanding them will be crucial to offer deals other players will accept.
Ambition is essentially the goals of the player, but also a measure of how aggressively they will pursue their interests. An ambitious player is usually more predictable and will be more likely to accept deals if it furthers their own interests. Players who lack ambition are quite dangerous precisely due to their unpredictability, so I encourage all players to show a healthy amount of ambition.
It helps to be flexible with your ambitions and not be too fixated on a single goal. This makes your diplomacy acceptable to more players, improving the chances of finding a deal you find beneficial.
Threat and the balance of power
So far we’ve discussed direct interests and ambitions, but in a complex game environment like EU4, not everything is about you. Many a time, protecting against an enemy is as important as growing yourself. A threat is someone who you do not want to achieve their goals. This could be because they pose a direct threat toward you, or simply because you expect them to be your enemy in the future. An example would be Scotland viewing England as a threat.
The balance of power is the idea that no single nation or alliance can dominate a region. This means that the strongest players should not be working together and the strongest players should always receive fierce opposition should they attempt to further pursue their interests. Naturally, it lies on the shoulders of other strong players to stop them, and ideally the strongest players rival each other. This doesn’t always happen, so sometimes a coalition of weaker countries also does the job. This means that all players must participate in the balance of power for it to work; it is not any single player’s responsibility. The most common runaways in my experience are Ottomans, France, Prussia and Russia.
Cooperation and conflict
What are the causes of cooperation and conflict? Players who have common interests with each other, or have a common threat tend to cooperate. In the former case, players work together and improve their position, while in the latter case, players work together to prevent a threat from improving their position. For example, two Italians may split the region by Genoa/Venice borders and work together. This prevents conflict of interests, all while protecting each other from powerful foreigners such as France and Austria. With this in mind, one can now identify who are the best allies by looking out for everyone’s interests and threats.
Conflict happens when players have interest in the same thing and only one can succeed (i.e. conflicting interests). Alternatively, they view each other as rivals or threats and want to prevent the other from succeeding. These players are most likely going to be enemies and go to war. For example, Castile and Aragon both wanting to unify Iberia, or France and Burgundy both wanting to unify France. This allows one to identify their future enemies.
In general, we can categorize everyone else with the following 2 questions, summarized in the table below.
- Do they want you to succeed or to fail?
- Do you want them to succeed or to fail?
| They want you to succeed | They want you to fail | |
| You want them to succeed | Your best ally | Protect against your enemies |
| You want them to fail | Puppet for your interests | Your worst enemy |
The ideal ally is someone who wants you to succeed and someone who you want to succeed. Meanwhile the ideal enemy is someone who wants you to fail and someone who you want to fail. You need to be more careful with the other 2 groups of people however.
Usefulness
We have discussed who to ally, but even if you found the right person, why would they ally you? The reason is that you must be useful to their interests; that is, you are an asset as an ally rather than a liability.
Being useful is vital to most countries’ survival, since it means that people want to keep you alive. The most obvious way to be useful is to have a powerful army (Prussia, Sweden, France, Burgundy, Poland) and/or a powerful economy. This means that you are useful in military conflicts, and can supplement their economy in war or recovery. There are many other ways to be useful, however.
A common one is to have high trade efficiency. This allows you make many mutually beneficial trade deals, and makes you highly sought after as a trading partner in a trade deal. Countries which benefit greatly from this are England, Netherlands, Portugal, Genoa, Lubeck and Venice since they have natural bonuses to navy and trade, as well as good control over strong trade nodes.
Another way to be useful is to act as a buffer state against a dangerous threat. No Austria player wants to be on the border with Ottomans or France waiting to strike, so Hungary or Burgundy can be useful to Austria as a buffer state. Similarly, Poland can be a buffer against Russia or Sweden.
It is not only vital to conduct correct diplomacy, but also to build your country correctly in order to be useful. For example, as Burgundy, going Exploration and Expansion is going to make you useless as a buffer state for the HRE against France; similarly, if you have Defensive, Economic and Offensive as Venice, the Ottomans are not going to treat you seriously as a trading partner. That said, however, you can still refund idea groups if the diplomatic landscape changes drastically enough to require it.
Military
How to survive in a hostile environment
War with another human player is the real meat of this game, the reason why multiplayer is so exciting. AI is terrible at war and can’t ever group up their army for a battle; but you can’t give anything but your absolute best in a war against another player, as you can be sure that he will too. In EU4, wars are won by sieging down objectives and pushing if you’re the attacker or holding if you’re the defender, and in the process it involves huge battles where the entire armies of both countries clash in 1-2 battles. It’s pretty common to see several million men on each side in the super late game. This chapter seeks to give primers on how war is fought in multiplayer and how to correctly prepare for it.
This section is somewhat more difficult to explain in text, and relies a lot on experience. Hopefully in the future Distinct and I will make a video series showing these ideas in practise.
Setup and Preparations
Before even considering to go to war, it is vital that your country is ready for war. You should have done your work at peace, building up your economy and army, and taking idea groups that strengthen your army (see above for ideas). It’s worth noting that no matter how skilled you are at war, if your army is just worse due to taking poor idea groups, it is going to be very difficult to win any war and you will become irrelevant. As a recap, the recommended build is here:
- Quality, Economic, Offensive, Innovative, Quantity, Diplomatic, Defensive, Administrative
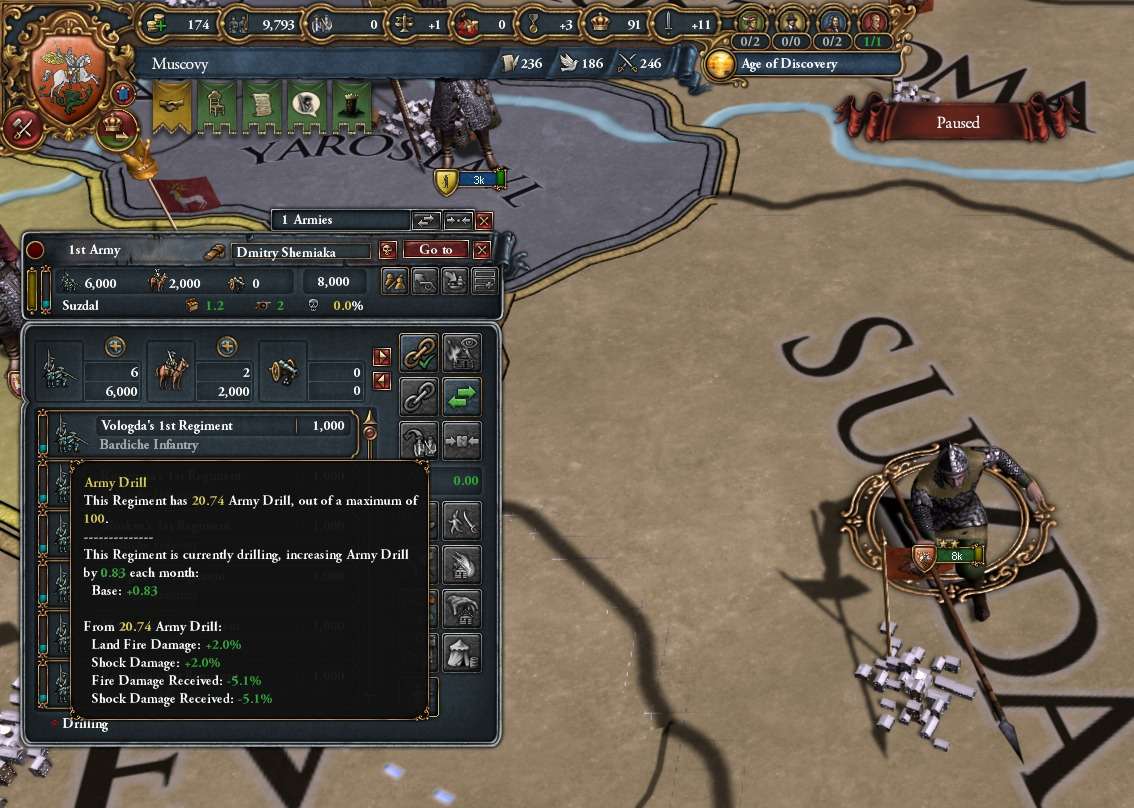
Since economy is an integral part of the strength of a nation it is generally recommended to make your country stronger first before attempting to take on weaker players. Getting force limit and manpower buildings will supplement your quantity assets and give you an advantage. Ideally every province should have a regimental camp and barracks. Developing with excess military points will also give you more manpower, and remember to turn on the manpower state edict for even more manpower if you can afford the increased state maintenance.
In multiplayer, most wars require players to leverage their full strength of their country. This requires full commitment of all resources, taking loans and hiring mercenaries at the start of the war. Before the war, you must be ready to commit enough to win. Players who are greedy and try to minimize their commitment can be punished by players who are more willing to go all-in, and end up making the war more costly or even lose what should have been a winning war.
The final thing to remember when going to war is to maximize your military bonuses. Never forget to turn on your policies, religion bonuses (Protestant Aspects, Orthodox Icons, Shia Schools etc), Defender of the Faith if it is available, hire an Army Reformer or Commandant (the latter is recommended late game), and have a strong general prepared. Maximizing prestige, army tradition and power projection before the war is also important.
Army Composition
One of the most common mistakes beginners make when at war in multiplayer is having an improper army composition. Even with a quality and/or quantity edge, poor army composition guarantees defeat against competent players.
Unit types
Infantry, cavalry and artillery can, depending on their unit group, have different types available. Respective effect of pips depends on the casualty modifiers of military technology.
From military tech 7 onwards, defensive pips are to be prioritized over offensive pips for infantry and cavalry because the backrow starts dealing damage.
Top priority is to be given to morale defensive pips, then to the defensive fire or shock pips depending on the military technology, then to offensive morale, then to offensive fire or shock pips depending on the military technology.
Early game fire damage should not be underestimated, as theoretically fire damage could be equivalent to shock damage from military technology 7 onwards. Fire damage becomes the undisputed main source of damage once players reach military technology 13.
The following infantry types are recommended for the Western unit group:
- 1. Latin Medieval Infantry;
- 5. Galloglaigh Infantry;
- 9. Landsknechten Infantry ;
- 12. Tercio Infantry;
- 15. Charge Infantry;
- 19. Reformed Tercio;
- 23. Grenzer Infantry;
- 26. Blue Coat Infantry;
- 28. Square Infantry;
- 30. Drill Infantry.
Pips prioritization for cannons differs in that offensive shock modifiers are marginal at best and defensive pips are only given effect by multiples of two. The latter is caused by the defensive pips of cannons being divided by two, then rounded down and ultimately added to the frontline’s defensive pips.
The following cannon types are recommended:
- 7. Large Cast Bronze Mortar;
- 10. Culverin (functionally equivalent to the previous one);
- 14. Large Cast Iron Cannon;
Later technologies are limited to 1 cannon type.
Which troops to build, and how many?
In a battle, cannons prioritize deploying to the back rank and infantry and cavalry to the front. Therefore, cannons should be fielded in multiples of the combat width; any extra cannons are useless in the battle since they don’t retreat even if their morale is completely depleted.
Early game cannons don’t do a lot of damage and are very expensive. You don’t want too many of them. From military technology 13 onwards, battles should not be fought without a full backline of cannons.
When you field more than 300 regiments you should consider a second cannon stack; 3 cannon stacks are recommended when you are fielding about 600 regiments. The 4th and 5th more cannon stacks are difficult to control and seldom worth the attrition, thus are not recommended for beginners although experienced players will always find uses for them past 1000 regiments.
All remaining regiments consist of infantry. Cavalry is not recommended in general as their performance in battle is less impressive than Infantry for most cases. Only Poland with cossacks and Manchu with banners can make good use of cavalry, but even then the infantry alternative is usually better.
Notice that I have yet to mention force limit. That is because in a serious war between players, force limit only determines how many mercs you can build, but it is not a hard cap for your strength. Players frequently take loans and go over their force limit if it is required to win a war; in fact committing hard by going over force limit early in the war often leads to the war ending quickly, which makes it cheaper than dragging it out. When going all-in, your full strength is determined by your manpower and merc capacity. A reasonable amount of troops to field in a serious war is your force limit plus merc limit.
To summarize, players should build 1-3 combat width sized cannon stacks and the rest of their army filled with infantry. These regiments are then organized according to their respective roles in war.
Cannon stacks
The division of regiments into cannon stacks and reinforcement stacks is the summa divisio of EU4 warfare.
Cannon stacks:
- Field a full combat width of cannons;
- Field a combat width of mercenary infantry and the mercenary infantry reserves needed to not get wiped (total about 1.25-2x combat width depending on quality difference);
- Are lead by a general;
- Have force march active when applicable for the purpose of reacting to enemy movement;
- Are positioned where they protect the friendly reinforcements stacks and threaten the enemy reinforcements stacks.
Because of the previous points, the cannon stacks are continuously taking attrition. Yet it is better to take attrition and have the potential to win battles than the opposite. Being greedy with regard to attrition will lose player wars. The attrition is furthermore partly mitigated by the mercenaries which comprise the frontline.
Reinforcements stacks
The rest of the army is organised in infantry reinforcement stacks. The goal of the reinforcements stacks is to reinforce the cannon stacks in battles. Only battles that are winnable or those that accomplish tactical or strategic objectives while ongoing should be reinforced.
Reinforcements stacks should consist of a full frontline of infantry. Mercenary reinforcements stacks should be the reinforcements stacks positioned closest to the cannon stacks as manpower is a rare and precious resource.
The vanguard
First up of the respective roles is the vanguard. The vanguard is the cannon stack responsible for sieging and for initiating the main battle. Consequently it has to be led by the best general.
When fighting war with allies, it is optimal for the player with the best cannons to assume the role of the vanguard. If said player does not have the best general in the alliance, a 1k infantry stack with that general should be assigned to follow the vanguard around.
The sentinel
The sentinel is the cannon stack responsible for protecting the reinforcement stacks. It is positioned on a province which the enemy has access to and where reinforcements stacks have to pass to reinforce the battle initiated by the vanguard.
When there are multiple options available, reinforcements should path through provinces protected by a terrain penalty so as to dissuade your opponent from initiating a second fight onto the sentinel in an attempt to cut off your reinforcements.
The commando
The commando is the cannon stack responsible for picking of enemy reinforcement stacks, initiating a second main battle or assaulting a fort when the enemy is committed to the main battle.
This stack forms the cornerstone of 2 or more cannon stack tactics. The ideal targets for the commando to attack are reinforcements not protected by a sentinel, or a second battle in a province that prevents the enemy from reinforcing the main battle entirely. The player should be cautious in seeking secondary engagements, as not all are beneficial. Recklessly attacking into unfavourable terrain without a specific purpose is a terrible idea.
The Main Battle Strategy
To win a war, it is necessary to win battles, and you can be sure that your enemy will bring all their military power to bear. Likewise, you need to be ready to send your entire military might. Wars in MP are characterized by such “all-in” battles where 2 players face off their entire armies against each other in a single huge battle, or 2-3 battles near each other. Doing otherwise will mean that less than your entire military potential is utilized, and the battle won’t go as it could have for you.
Hopefully by now it is clear that all stacks in your army work together to achieve tactical and strategic objectives – no individual stack operates independently from the others. The way your cannon stacks engage the enemy revolves around a specific “all-in” battle called the main battle. In this section we break down how to identify advantageous battles and how to play around it.
Choosing a battle
Before committing to any huge battle, the player should identify which battles are advantageous. There is currently a bug in the game which causes defenders in battles to receive a much larger bonus than the terrain penalty would suggest. This extra defender tile bonus is more significant the longer the battle goes on. This means that any defensive battle is an advantageous battle, even on flatlands. Battles on rough terrain where you are the defender are thus excellent battles and should always be taken when the opportunity for them arises. Enemies attacking into your cannon stacks or besieging forts are therefore the best candidates for the main battle.
When defending a fort which is besieged, one should avoid attacking when the enemy is about to complete a siege phase with a positive chance to succeed. Doing so runs the large risk of the enemy winning the siege with a breach and therefore making you the attacker rather than the defender. This would turn the terrain advantage against you and instead of taking a good battle it would be a disaster.
As a general rule of thumb, one should avoid choosing an offensive battle as the main battle, unless you are significantly stronger than the opponent. These battles are almost always disadvantageous and unless they serve a purpose one should retreat out of them as soon as possible to avoid losses to manpower and warscore.
Likewise one should typically avoid being on the offensive when the opposing party has more cannon stacks and the reinforcement path cannot be entirely protected.
Choosing a general
The game, when multiple generals are engaged in the same battle, uses a specific algorithm to select one to lead. This algorithm does not always select the optimal general. Therefore it is important to identify the optimal general per battle and ensure that another general the game considers better does not enter the battle.
The optimal general depends on the military technology and province layout. A general with 1 extra maneuver could be superior to another with 1 extra shock late game if the aggressor had to cross a river crossing. General fire pips are to be prioritized over shock pips between military tech 8 and 10, and from military tech 13 onwards.
A final consideration is that a general can perish mid battle. It is hence recommended to have another general leading a reinforcement stack (the 4th or 5th general) be present in the battle.
Optimal combat sequence
Once a satisfactory main battle has been identified, it is time to execute the strategy. The main battle is always taken by the vanguard because this is the stack with the best general.
This should be followed by reinforcement stacks every 10 days, plus or minus up to 2 days depending on the quality difference between the you and your opponent, and the dice rolls. The theoretical ideal is to reinforce such that your front line does not break and you have less than 40k infantry in reserves, but in practise I recommend being more liberal with reinforcements as it is better to have too many infantry in reserves than to have your frontline breaking.
When sending reinforcements into the main battle, the top concern is that your entire army arrives on time to reinforce. Therefore your reinforcements must begin moving from the back. If you start reinforcing from the front, reinforcements take longer and longer to arrive to the battle and eventually reinforcements at the back are too far to arrive on time. I recommend selecting your entire army of reinforcements just before taking a main battle and moving them all to a province next to the battle before splitting them as required to reduce attrition. This ensures that your entire army moves to reinforce simultaneously, greatly decreasing the odds of there not being a reinforcement stack nearby to reinforce.
If your frontline breaks, cannons will move to the front and take massive damage before retreating. This results in huge casualties, but also removes cannons from your backrow permanently, reducing damage you deal and increasing damage you take for the rest of the battle. Therefore unless this battle is extremely important and you are willing to commit further cannon stacks to enter the battle, this battle is already lost and thus you should retreat as soon as your frontline breaks.
The main battle continues until one side runs out of reinforcements, then they will be forced to retreat to protect their cannons when their frontline breaks. If both sides run out of infantry and have their frontline break, the resulting cannons vs cannons battle is costly but occasionally worth the commitment if winning the battle would result in a significant strategic gain. As the main battle draws to a close I recommend reinforcing with the sentinel to add an extra cannon stack to improve performance in the cannons vs cannons phase, and pull the moment you get a bad dice roll in fire phase. Only stay in the battle if it is cannons vs cannons; staying when your front broke but your opponents’ front is still intact is a terrible idea due to the huge casualties you will receive to your cannons.
Secondary engagements
In addition to the main battle, players often seek secondary engagements with the commando and parry opposing movements with the sentinel. As described in their sections, the commando’s primary goal is to either cut off enemy reinforcements into the main battle, or to take an objective while the main battle is taking place. The sentinel’s primary goal is to protect your reinforcements from enemy commandos and protect any objectives the enemy commando is trying to take.
Making the most out of secondary engagements is mostly a matter of experience. An astute player is always out for opportunities to pick off that unprotected reinforcement stack not protected by a sentinel, or to assault a fort while your opponent is too focused reinforcing the main battle. It also pays to be more impetous when seeking opportunities; at worst if you took a bad battle, hopefully your commando was large enough to not get wiped in 12 days and you will be able to retreat with only merc losses; if you engage correctly you can pick off stray stacks, or distract your opponent into missing his reinforcement tempo.
Finally secondary engagements are advisable when the difference between the sides respective second best general is greater than the difference between their respective best generals.
Planning your movements
Before making any moves, it is of the essence to plan them in advance, and try to make simultaneous moves with force march on your cannon stacks from fog of war. This reduces your opponents’ ability to react, making your plays more likely to succeed. The first step to planning is to visualize your stacks’ pathing. Knowledge of zone of control is useful to know where your opponent can and cannot path; your own stacks’ pathing can always be tested in-game.
Before moving the vanguard to engage, one must plan out the reinforcement path to the main battle. In particular, consider these things:
- Can I reinforce from a route that cannot be intercepted by the enemy? If so, then there is no need for the sentinel and it should perform the role of another commando;
- Can the enemy completely cut off my reinforcements to the main battle by taking secondary battles? If this is the case, you have to be prepared to give up the main battle and take the advantageous battles with sentinels when your opponent cuts off your reinforcements;
- Does the reinforcement path incur a crossing penalty? If any of the reinforcement stacks incurs a crossing penalty, you will give a crossing penalty to the entire battle. Therefore when taking offensive fights you should attempt to reinforce in a way that avoids crossing penalties as far as possible.
I recommend keeping reinforcements protected behind fort zone of control; those reinforcements that have to walk through lands that your enemy can path to must be protected by sentinels.
Commandos and sentinels have to be in position and have their path planned out before the vanguard engages. This way the simultaneous nature of your multi-pronged attack makes it less likely for your opponent to be able to parry them all. On the flipside, when in a stalemate it is quite important to map out your opponent’s moves as well. That way if they start moving you will be in a position to react. Be aware of possible paths their commandos can go, and be ready with sentinels to stop them, and avoid routing your reinforcement path through these provinces. Anticipate the pathing of their reinforcements and be ready with commandos to intercept them.
Closing Words
It is my hope that this guide has helped you gain insight into this game. And you should not be afraid to take up EU4 multiplayer, so perhaps we will meet on the battlefield one day – either as allies or enemies.

Be the first to comment