
Walkthrough + Puzzles
Here’s a walkthrough for anyone stuck on the level. I tried to break it into several small hints and pieces of the solution so you can only get the hints you need and not spoil the puzzles.
Puzzle #1
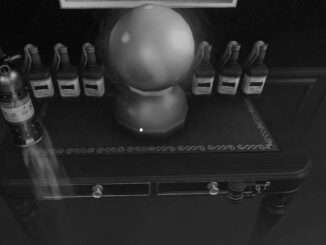
Looking around the room you find yourself stuck in, it appears the only useful things in here are some small canopic jars on a table and some moveable pedestals.
Hint 1: You notice the canopic jars can be used to lower the pedestals.
Hint 2: Experimenting with the jars, you find that each jar weighs a different amount. (Each moves a pedestal a different amount). “But how far down does each pedestal need to move?”, you wonder.
Hint 3: You think to yourself, “I wish someone put markings on a wall indicating how far down the pedestals should go.”
Solution:
- The red/black lines on the opposite wall indicate the position of each pedestal (how far down each should move.)
- Pedestals should be at the positions (from left to right):
- 3 (Lowered down to the 3rd mark.
- 1 (Lowered down to the 1st mark)
- 4 (Lowered down to the 4th mark)
- From left to right, place:
- Jar with human head
- Jar with jackal head
- Jar with baboon head
Puzzle #2
Just as you place the 3rd jar correctly, you hear the grinding of stone, and notice four large wheels emerge from the wall. They appear to have colored hieroglyphic symbols on them.
Hint 1: Noticing that each wheel has a symbol (or two) below it on the wall, you know those are connected, but how?
Hint 2: “Oh yeah!” you recall… “The jars had those symbols on them. But how does that help???” you ponder.
Hint 3: On closer inspection, you find that the canopic jars have removable lids, and that each jar contains colored sand.
Hint 4: “Hmmm….” you think. “Each jar also has a symbol matching the ones below each stone wheel.
Hint 5: Noticing there are two tiles below a couple of the wheels, you think “Maybe I need to use the color I’d have by mixing the colors together.”
Solution:
- Each wheel must be rotated to match the color indicated on the symbol(s) below the wheel.
- Where there are two symbols below the wheel, you must use the color you’d get by mixing the 2 colors in the matching canopic jars.
- The colors of the wheels from left to right:
- Red
- Orange
- Purple
- Blue
Puzzle #3
As you lock in the position of the final wheel, you hear the grinding of more stone. You notice there are nine stones protruding from the opposite wall.
Hint 1: “Didn’t this wall have a painting of nine illuminated suns on it before?”, you think.
Hint 2: You discover that pressing on each stone moves the stone (and each above, below, or beside), as if reproducing the image of the 9 suns. “Maybe they all need to be lit”, you decide.
Solution: You need to toggle all the stones to be lit. The steps to do so change depending on which are lit, so I’ll assume you’re starting from their initial configuration.
The shortest solution is (any order works):
- Top-Center
- Bottom-Left
- Bottom-Center
- Bottom-Right
Puzzle #4
You hear the grind of stones again. Suddenly realizing the growing pile on the floor, you recognize these look like painting pieces for the broken stone painting on the wall.
Hint: Placing the pieces of the painting on the wall, you think “It looks like this painting has four missing pieces. It’s a good thing I gathered all four of those.”
After placing the last missing piece, panels retract and two more rows of stone wheels emerge. “Now what??” you say to yourself.
Hint 1: After studying the painting a while, you notice the wheels share symbols from the painting.
Hint 2: After fiddling with the wheels a bit, you conclude that both horizontal and vertical wheels line up to each of the symbols.
Hint 3: You recognize the symbols from top to bottom are: “Eye, Feathers, Lion, Vulture, Hand”.
Solution: The first 3 pieces of the paintings fall from the ceiling as you complete each puzzle. The fourth puzzle pieces is on the bottom shelf of the stand in the middle of the room. Once the wheels are visible, the wheels must be rotated so that each matches the symbol shown on the corresponding row/column of the painting. Each symbol used has one horizontal wheel and one vertical wheel that must be set.
The wheels stacked vertically on the right (rotating horizontally) should be set to:
- Eye
- Feathers
- Lion
- Vulture
- Hand
The wheels arranged horizontally along the bottom (rotating vertically) should be set to:
- Hand
- Feathers
- Vulture
- Lion
- Eye
After solving the painting, you hear a final groan of stone, and notice the door has eased open a bit. Walking over to the door, you open it further and are relieved to see you have freed yourself!


Be the first to comment