
Map Walkthrough
Entry Hallway
This first thing you will need to do is pick up the lock painting on the left side of the hallway and place it on the hook above it next to the door. Remember this place we will come back to it later.
Kitchen
- There are a few different locks and puzzles to complete in here, you can’t do some things until others are complete.
- First thing to do, go to the oven and drop the front door and get the “White Knight Figurine” out, hang on to this. We will need it later.
- Second, on the counter is a bottle of “1973 Pinot Noir”, don’t drink it. Just hold on to it.
- Next, You want to got to the last two drawers on the right and open the one that highlights, grab the rag out of this drawer and hold on to it.
- Then, Behind a potted plant that is above the draw grab “Book 4” this is for the next room.
- After that, in the cupboard above the counter, grab the “1955 Paullic Red Wine”
- As your round the room, you will see a wall with a horse painting and a butterfly painting. Take both of these down, you will need another painting for this puzzle,go back to the hallway across from the lock painting and pick up the cat painting.once you have done that return to the wall. You must hang the paintings in a particular order, this will open the cellar door to the left of the paintings.
- Solution: I would say Alphabetically (Butterfly, Cat, Horse)
Cellar
The only thing you need in here is the “1897 Red Island Gin”.
Kitchen Pt.2
- At this point you should have 3 wine bottles, they go on the three black disc on the counter between the stove and sink. They have a particular order.
- Solution: They are sorted by age (1897, 1955, 1973)
- Once you have completed the wine bottle puzzle a cabinet, directly below them will open. Inside you will find the “Library Key”, this room at this point is located directly behind you.
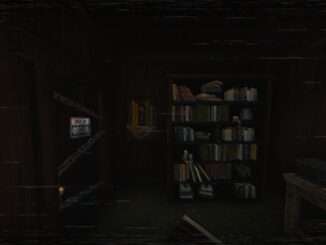
Library
- The first thing I recommend doing is locating 3 different books, you already have “Book 4”
- Locations:”Book 26″ is located on the desk to your right as you walk in, it is red and brown, “Book 19” is located on the first bookshelf on the same wall as the desk above a cabinet all the books together will unlock. “Book 7” is located on the last book shelf, on the very top shelf.
- Going back to where you found “Book 19” is where the puzzle takes place, there is a letter explaining how to arrange the books on the cabinet directly below here.
- Solution: The books are order chronologically by even number and then odd numbers (Book 4, Book 26, Book 7, Book 19).
- When the cabinet opens it will reveal a book “Victim List”, you will need to go back to the kitchen and open the window blinds.
Back to the Kitchen
When you open the book it states “Blues was my first, Red was my second, Yellow was my last. This is the order to enter the numbers on the lock in the libraryThe numbers you are looking for, are the number of the same colored planks below each colored skull.
Library Pt. 2
- Back on the desk where you found “Book 26” is a box, the skull puzzle from the previous tips corresponds with the small brown box on this desk.
- Solution: 3, 1, 4
- From the small brown box you will get a “Glass Door Key”, this is for the glass door on the same desk.
- After unlocking the glass door, there will be a book “Celestial Dynamics”,there is a number on the back of the book.
- Behind you at this point, next to the door as you walk in is a cabinet with an open book and candle on it. The combination from the “Celestial Dynamics” book will open the lock.
- Solution: 843
- Once you have unlocked the combination lock, the cabinet opens to give you the “Bathroom Key”
- The bathroom is located next door to the library.
Bathroom
The only thing you need here is to wipe the mirror off with the rag that you got early from the kitchen drawer. Which will reveal a code to use on the refrigerator door.
Kitchen Final
Using the code from the bathroom, open the freezer portion of the refrigerator. Grab the picture of a key.
Solution: 8273
Hallway Pt. 2
After getting the “Key Painting” from the refrigerator, return to the door that you place the lock painting next to and place the “Key Painting” on the hook to the left of the door. This will open the door to the living room.
Living Room
When you enter this room you will see a kids gaming corner and a game called “King of the Hill Board Game” you will need 4 chess pieces to solve this puzzle, there is a piece of paper next to the game to show you their order. Once they are all placed correctly, this will open the utility room door that is inside the living room.
Chess Piece Locations: The first was in the oven in the kitchen “Knight Figure White”, The second is in the library, on the shelf next to the trophies “King Figure White”, the third is in the box in the kids corner in the living room that has a combination on it.The box containing the 3rd chess piece has a picture of a clock above it,there is a clock in the room.the clock reads 2:45 combination. grab the “Queen Figure Black”, the last one seems to be the hardest to find. In the living room on the bottom shelf of the coffee table in front of the couch is “Pawn Figure Black”
Solution: “King Figure White” goes on the top of the mountain, “Knight Figure White” goes in the middle of the mountain, “Queen Figure Black” goes at the bottom of the mountain, “Pawn Figure Black” goes in the water at C1.
Utility Room
First thing is to grab the screwdriver
Living Room Pt. 2
Use the screwdriver to open the vent. Grab the red “Vent Pipe”
Utility Room Pt. 2
- Open the electrical panel to your right as you walk in. Place the “U” shaped piece inside of the electrical panel. Rotate the pieces until you create a complete path from the green piece on top to the green piece on the bottom. This will restore power in the room.
- The computer will power up and display a message, this will tell you the combination for the box on the desk.
- Solution: 1975
- Take the USB flash drive out of the box. Place it into the computer.
- Click the keyboard, to open the cabinet next to this desk, you will receive a remote for the TV.
- On the desk is a green folder, inspect it and grab the key card off the back of it. While you are in here, grab the picture on the desk of a skull so you don’t have to come back.
Living Room Again…
Use the remote on the TV, it will show you the order of items that need to be placed on a table next to the fire place.
Library Final
When you walk into the library, go straight to the back wall. The bookshelf to your right at eye level will have a set of books you can click, this will move them out of the way. This reveals a card reader that you can use the “Red Keycard” on to open the bookshelf. While in here get the lamp off of the desk.
Hidden Room
Pick up the “Book” titled “Potions and Philters”
Living Room Final
- Use the remote on the TV, you will need to inspect and push the power button.
- Place the items on the desk next to the fireplace, the same as it shows on the TV. You can not put these items on the desk without first turning on the TV. This will release a draw containing the attic key.
Attic
- When you first enter, turn immediately left and go all the way up to the painting that is leaned up against some box to get “Ripped Painting”
- After getting the “Ripped Painting” turn around and go to the left corner of the wall that was behind you and place the “Ripped Painting” piece in the frame. This will open a drawer with a cowboy hat in it.
- Turn around and head straight behind where you were just looking. You will find a check with a combination on it. Look in the cowboy hat for the combination.
- Solution: 716
- Take the crucifix from the box, turn around and head to the right corner of the wall the is behind where you were just standing.
- Place the crucifix on the table on the pentagram between the skulls.
- A skull will appear from the pentagram, click the key in his mouth. Exit the attic using the black square next to you.
Briefly back to the Hallway
Turn down the hallway to the left and enter the first door you see open.
Bedroom
Grab the candle off the dresser and use it on the painting of an illuminated doorway. Turn Around and Enter Door!
Outside
Note the “X” on the ground. Enter the door.
Morgue
- On the billboard you will tell you the items, corpse and time to match.
- Solution: Oven 1: Blade in Head, Arrived at 8:30AM, Black Top Hat – Oven 2: Hammer to the face, 2:15PM, Glasses and Blue Baseball Cap. Oven 3: Prosthetic Eye, N/A
- Once you solve this puzzle Oven 2 will open. Take the black light and shine it on the white board.
- Exit the entrance door back to the bedroom.
Bedroom Pt. 2
- Once you come through the door, make a U-Turn to the left and find the combination lock on the dresser.
- Solution: 666
- Take the “Bedroom Key” out of the drawer.
- Use the “Bedroom Key” to get out of the bedroom back into the hallway.
Hallway Last
- Note the colored eyes and the number on the toe tag on each of the skeletons.
- Go down the long hallway, that you haven’t been down yet. At least if you are following this guide. It is the next opening to the left of the bedroom door while facing it. You will find a briefcase with a color combination. It correlates to the skeletons.
- Solution: 592
- Take the “Front Door Key” out of the briefcase, continue down the long hallway.
- Use the “Front Door Key” on the door clearing marked “EXIT”
- Congratulations, You have escaped!


Be the first to comment